
DIY Concrete Side Table | Easy

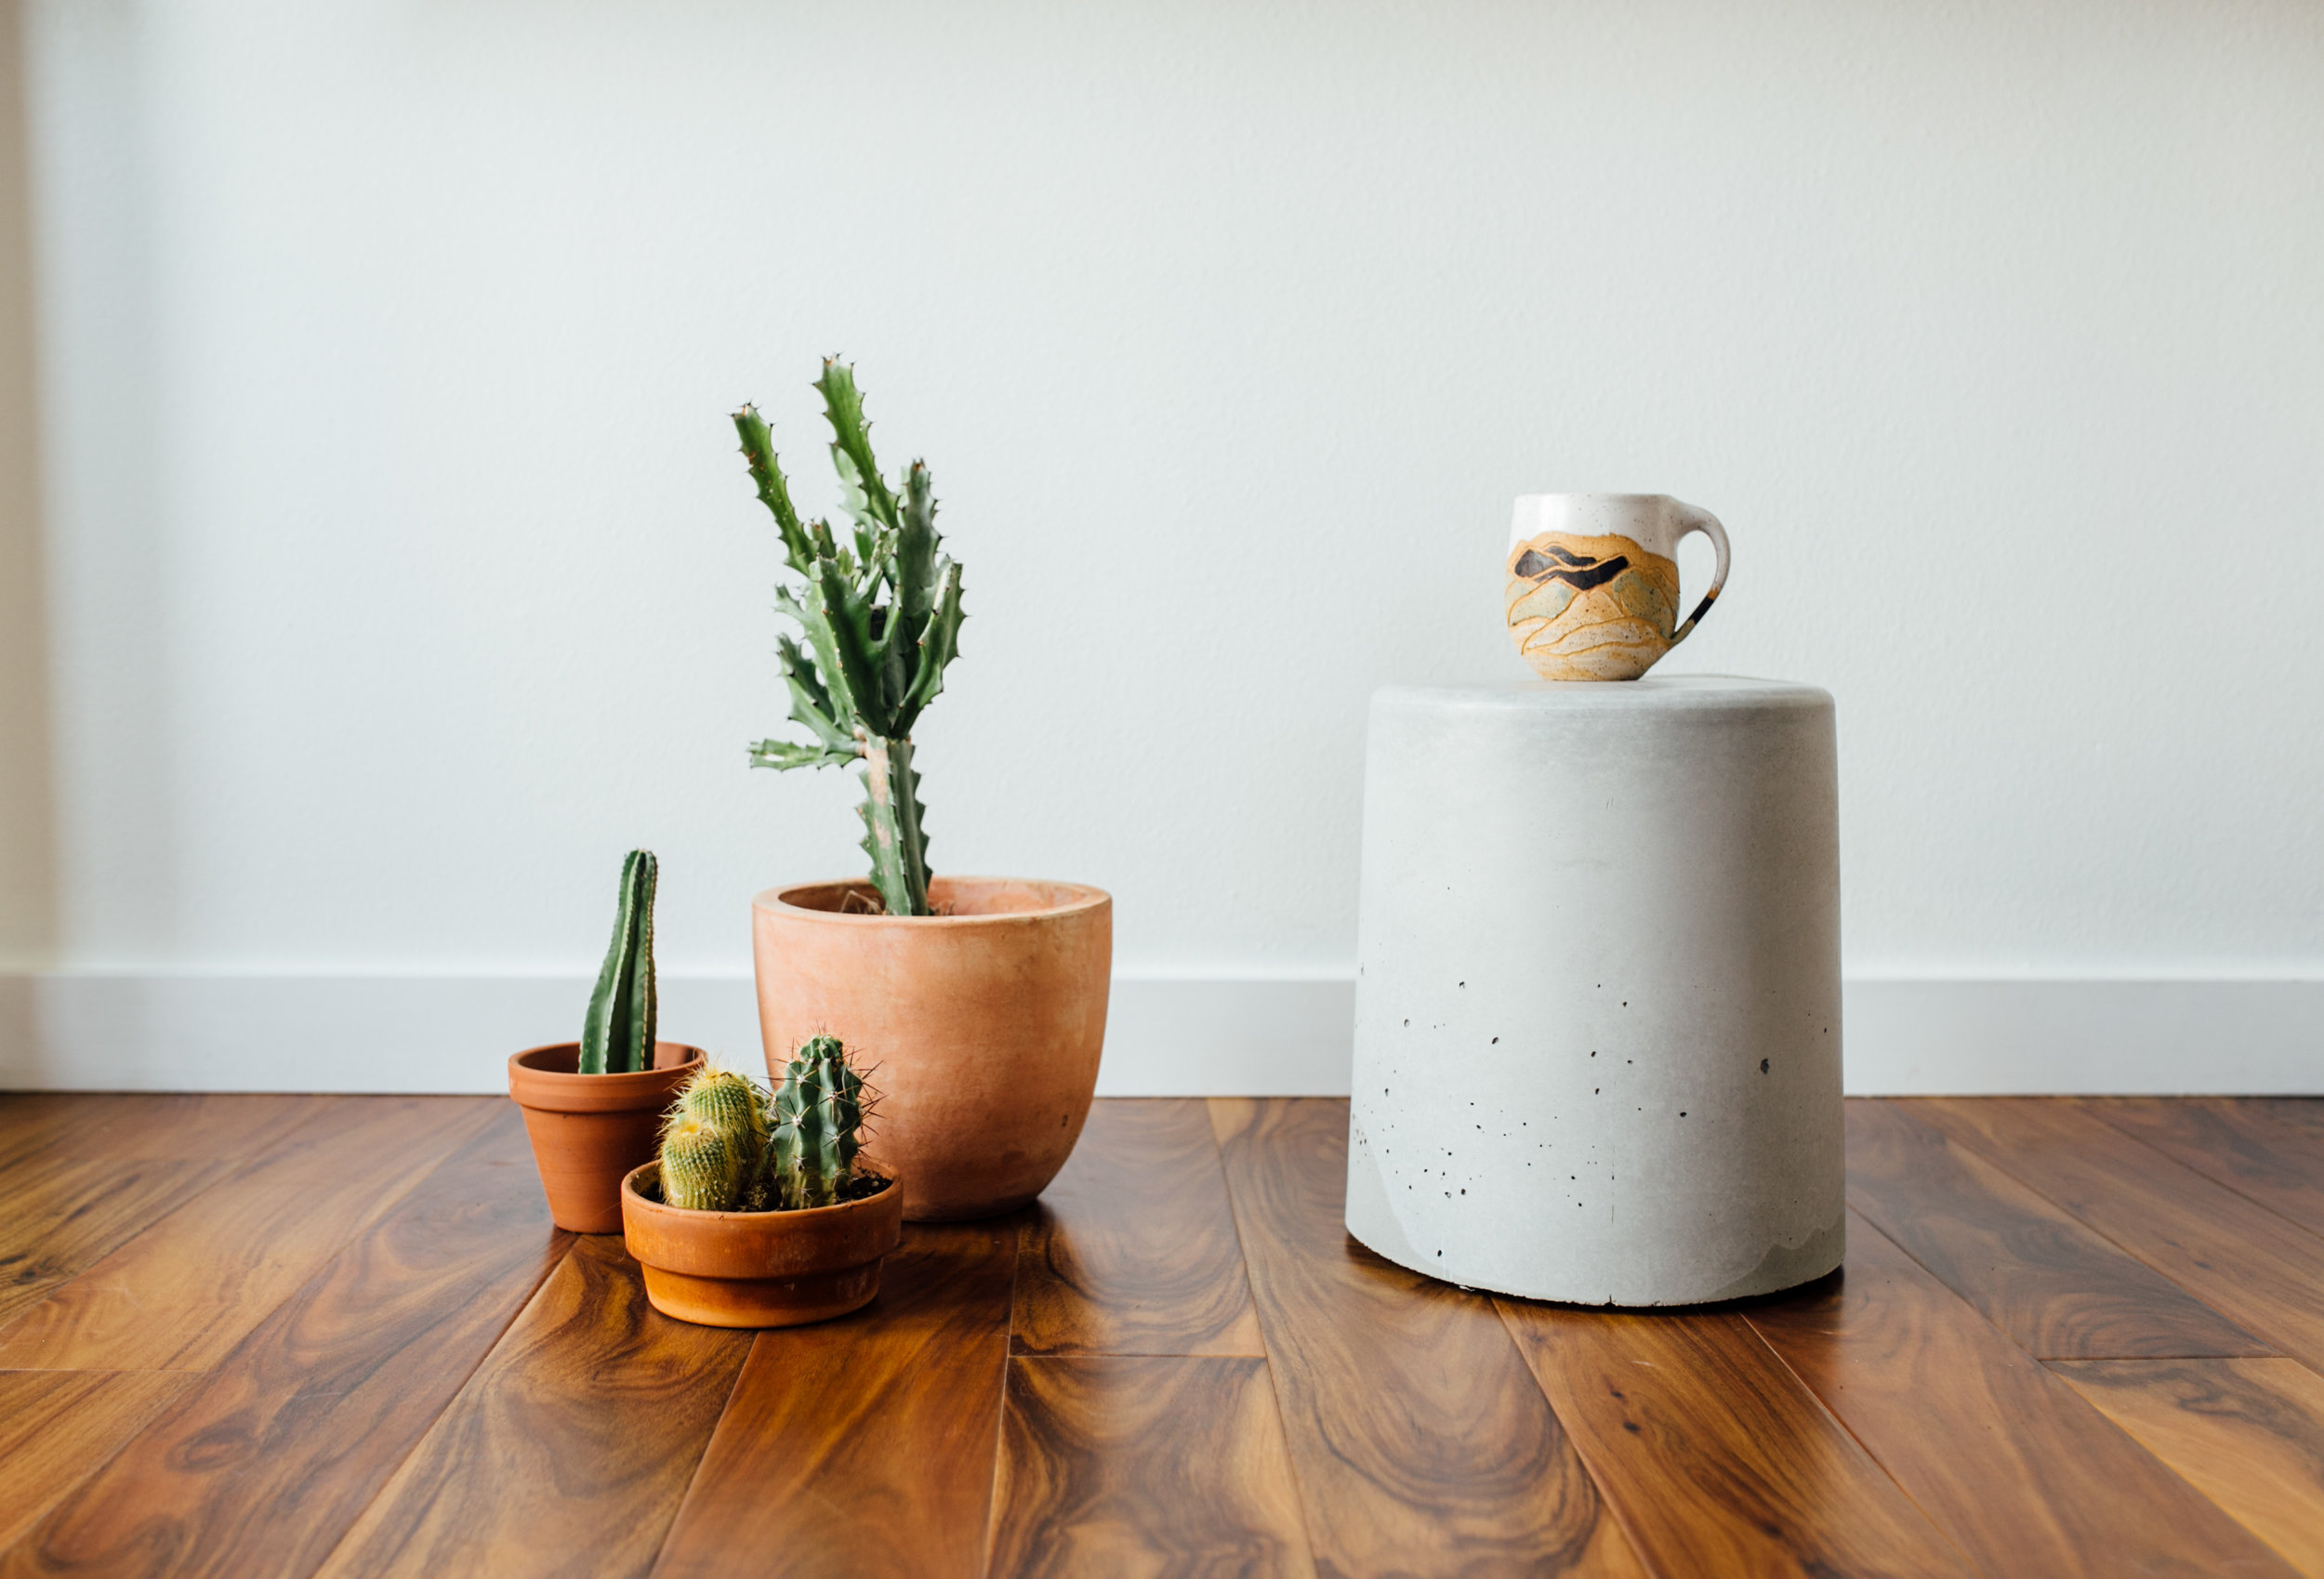
This Maker Gray tutorial shows how I made a super easy small concrete side table. It could also be used as a stool, plant stand or anything similar. This is a project that was extremely easy and very inexpensive! I really love how minimal and modern it is.
Materials and Tools I Used:
5 gallon bucket
Concrete
Cooking Oil
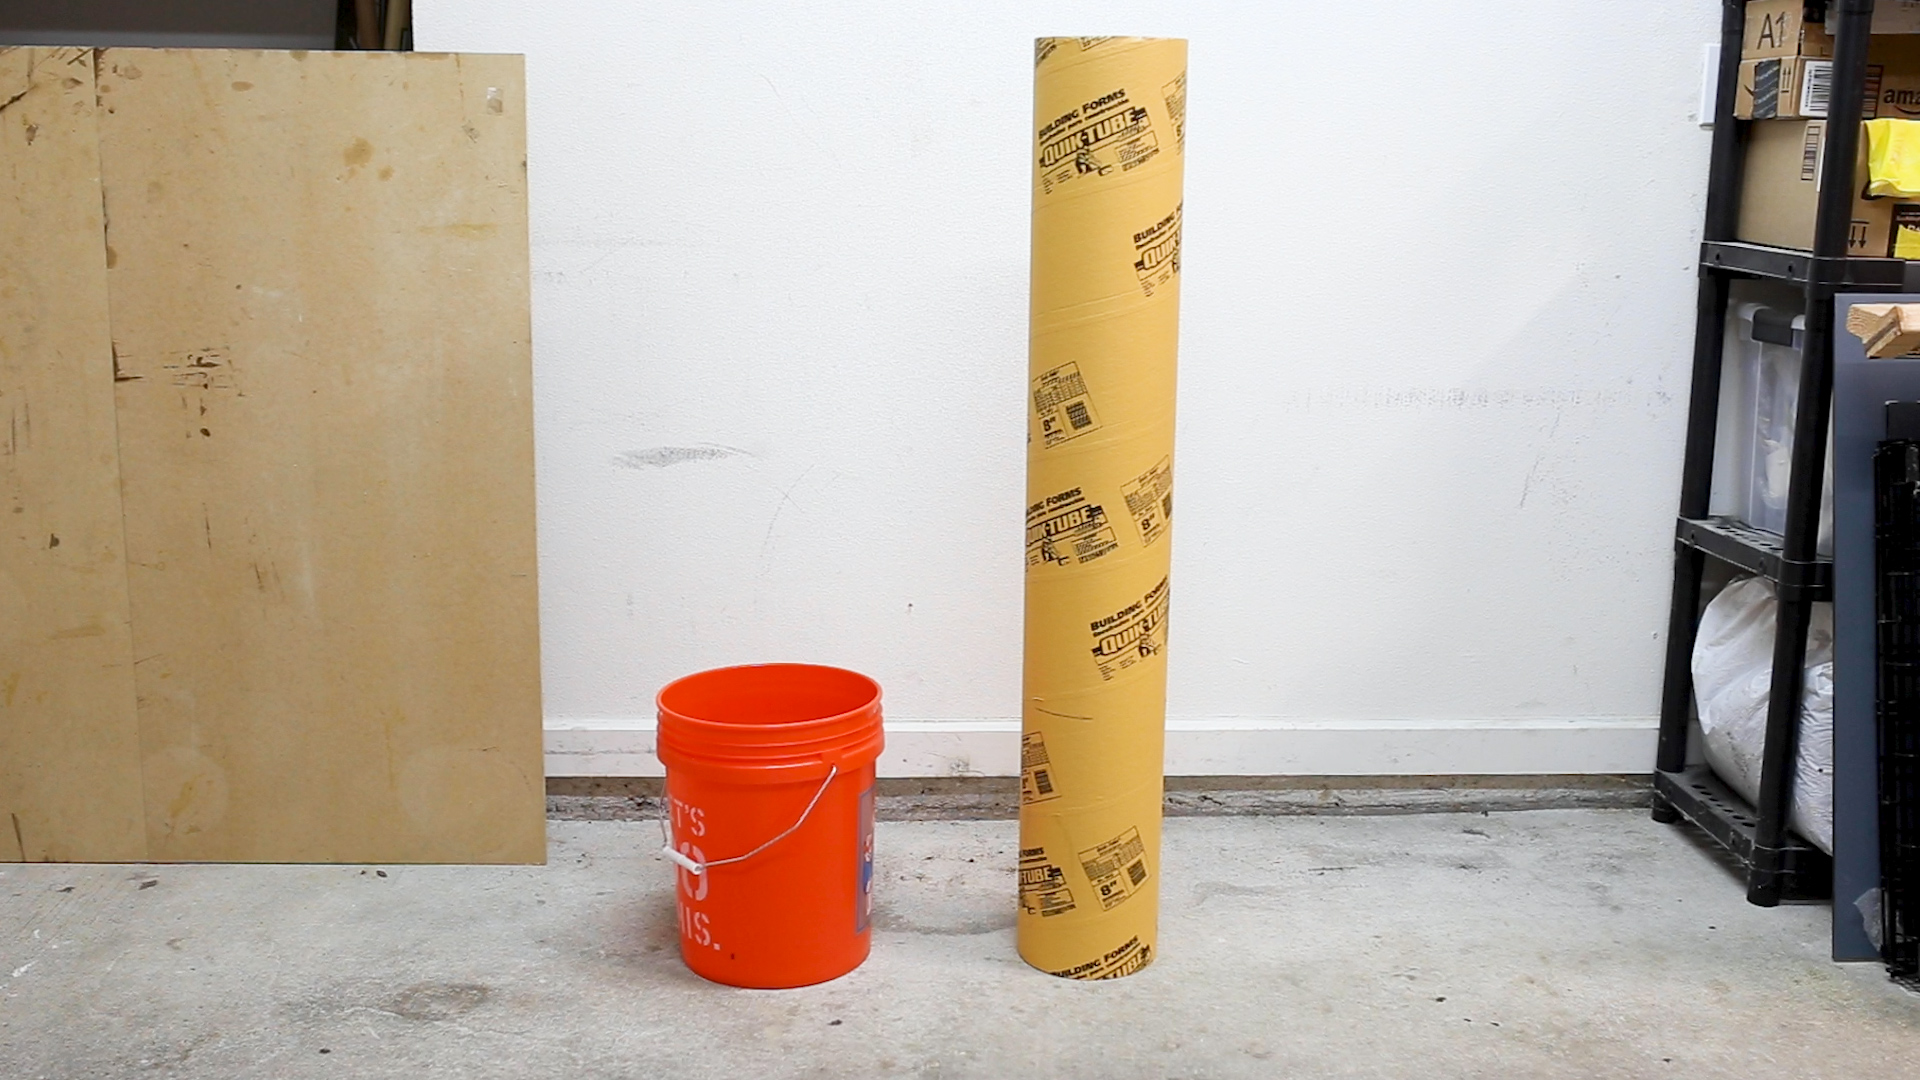
For the concrete form, I used a 5 gallon bucket and a Concrete Form Tube

I cut the tube with my Japanese Pull Saw to be the same height as the bucket

To seal off one end, I used a piece cut from a Thick Plastic Bag and Duck Tape

And then I mixed up some concrete. I used Quikrete 5000.

I added the concrete to the bucket, only initially filling it about 1/3 full

Before placing the inside tube in, I rubbed the exposed cardboard with a coat of cooking oil to help it come out once the concrete is cured
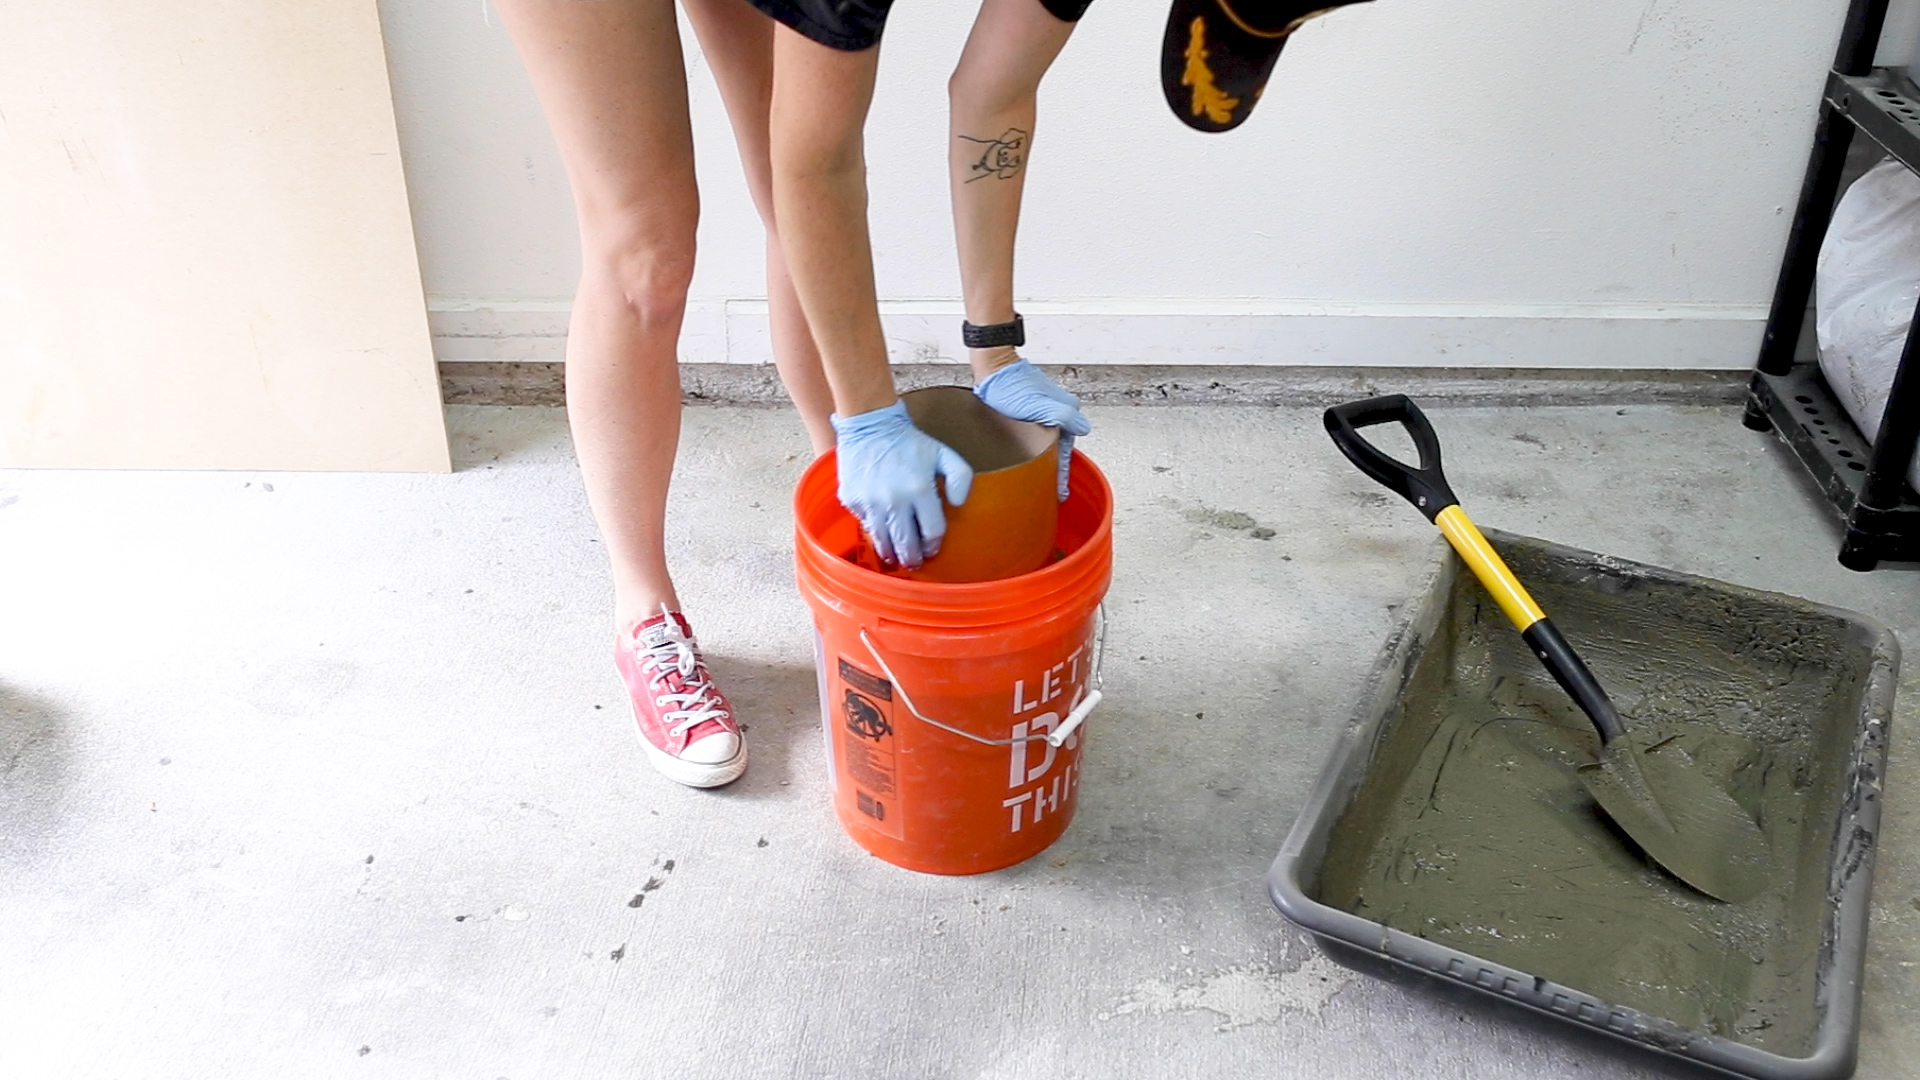
And then I pushed the plastic side of the tube down into the concrete a couple of inches

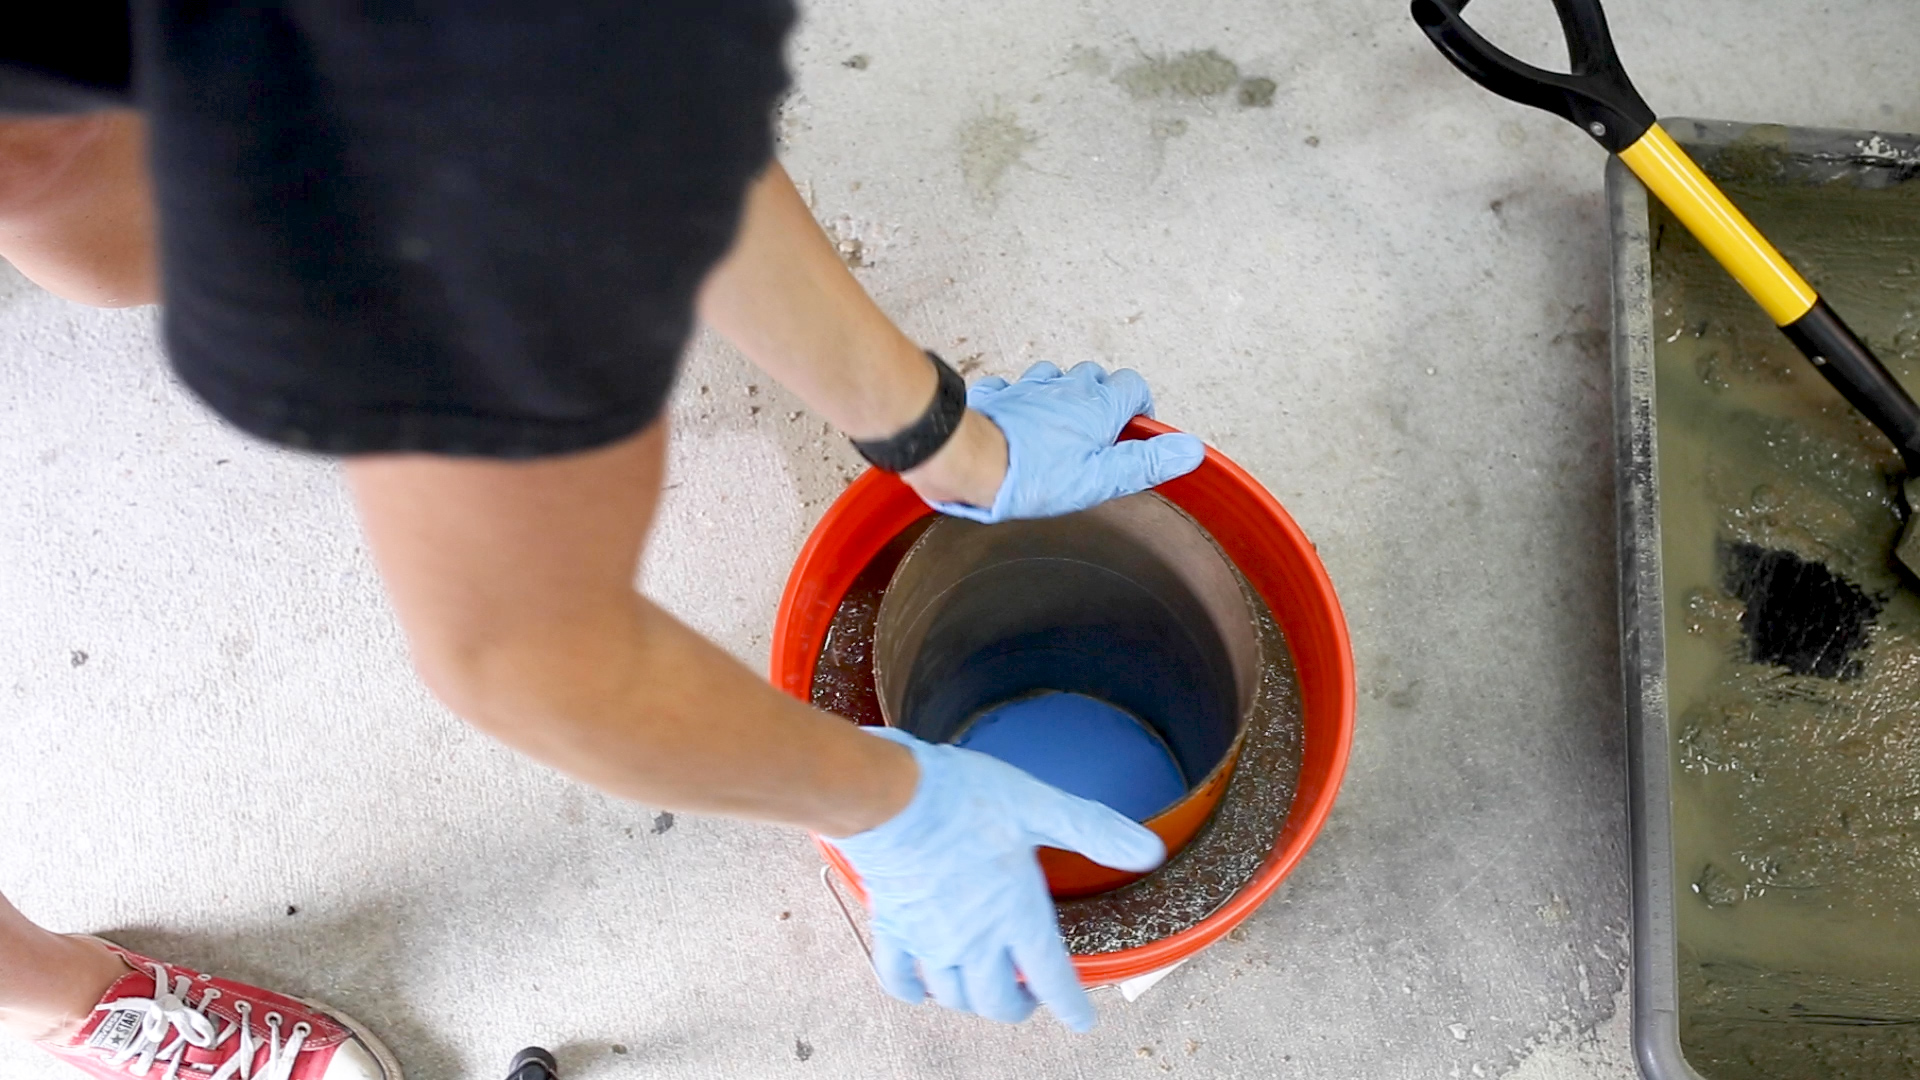
Once it was in place, we filled in the sides with the rest of the concrete
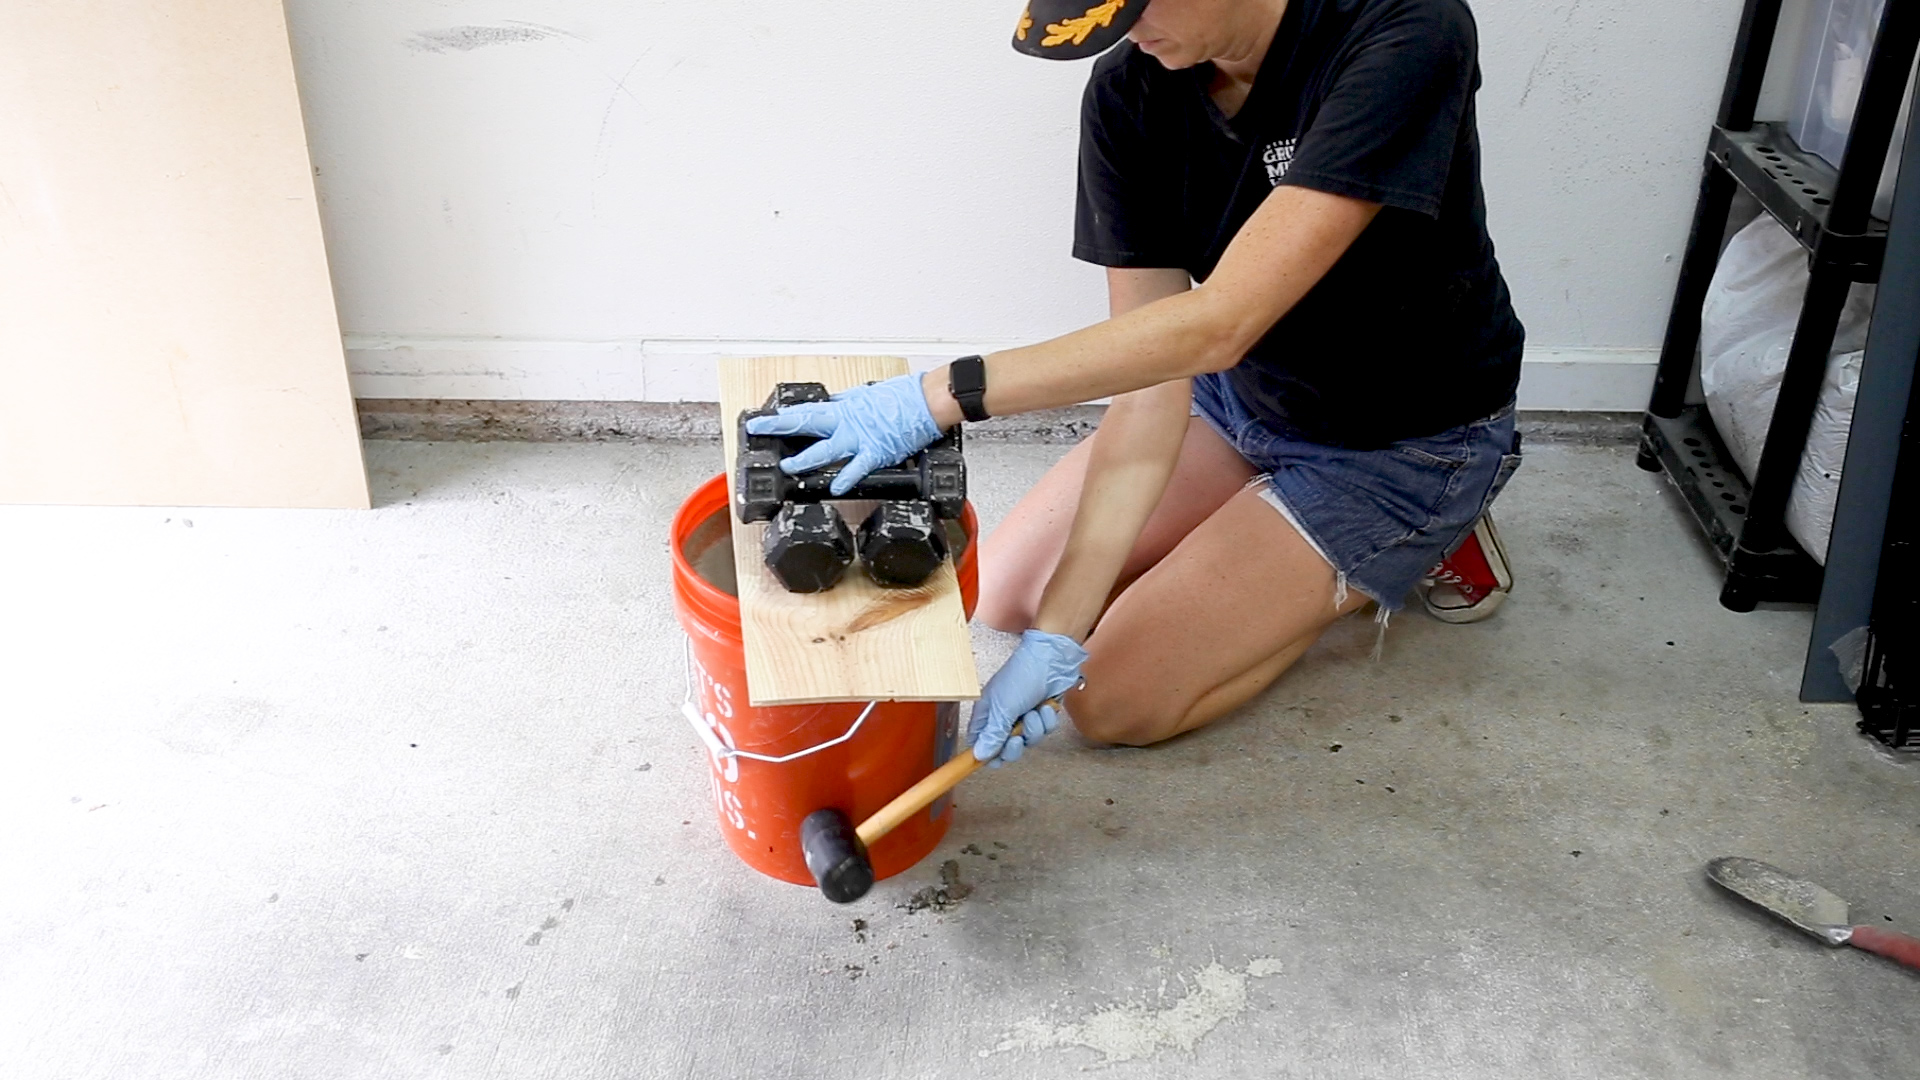
While using extra weights to help hold the inside tube down in place, I took my Rubber Mallet and hammed on the outside of the bucket to help air bubbles come out
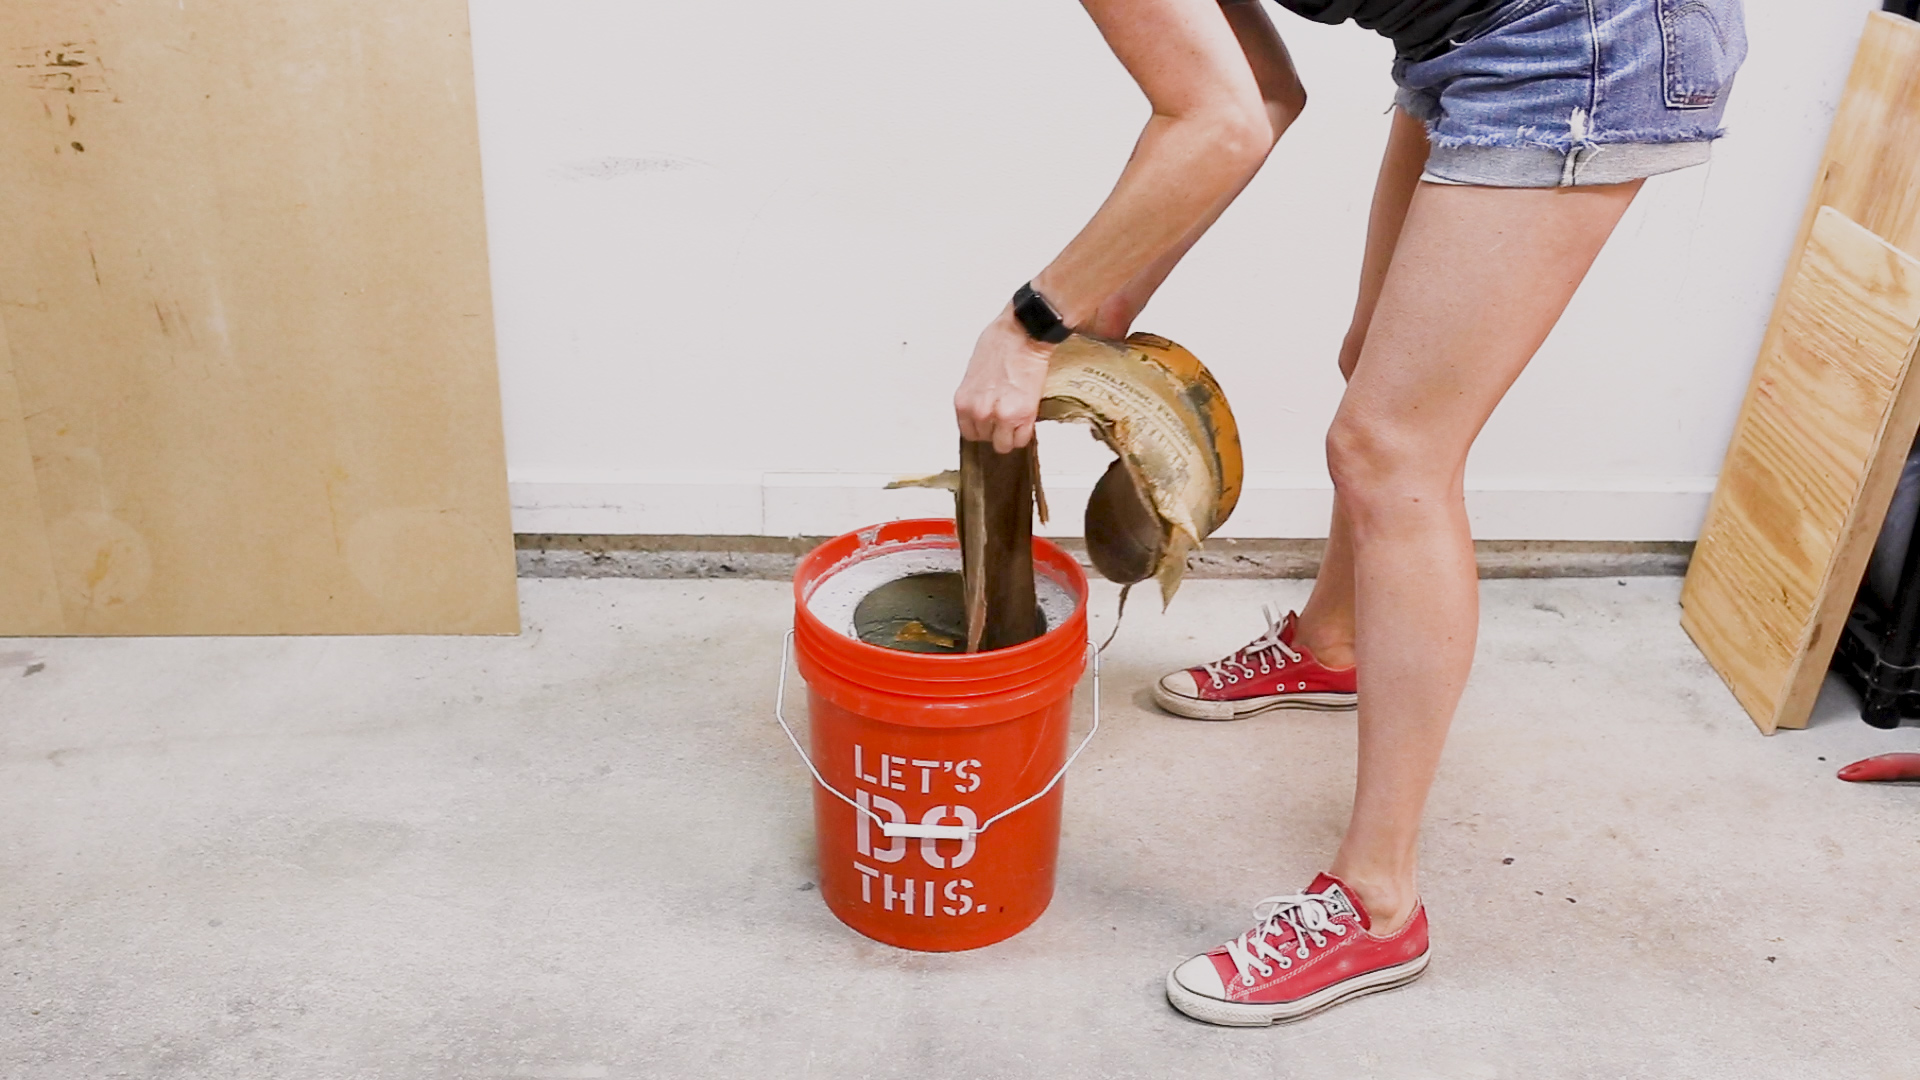
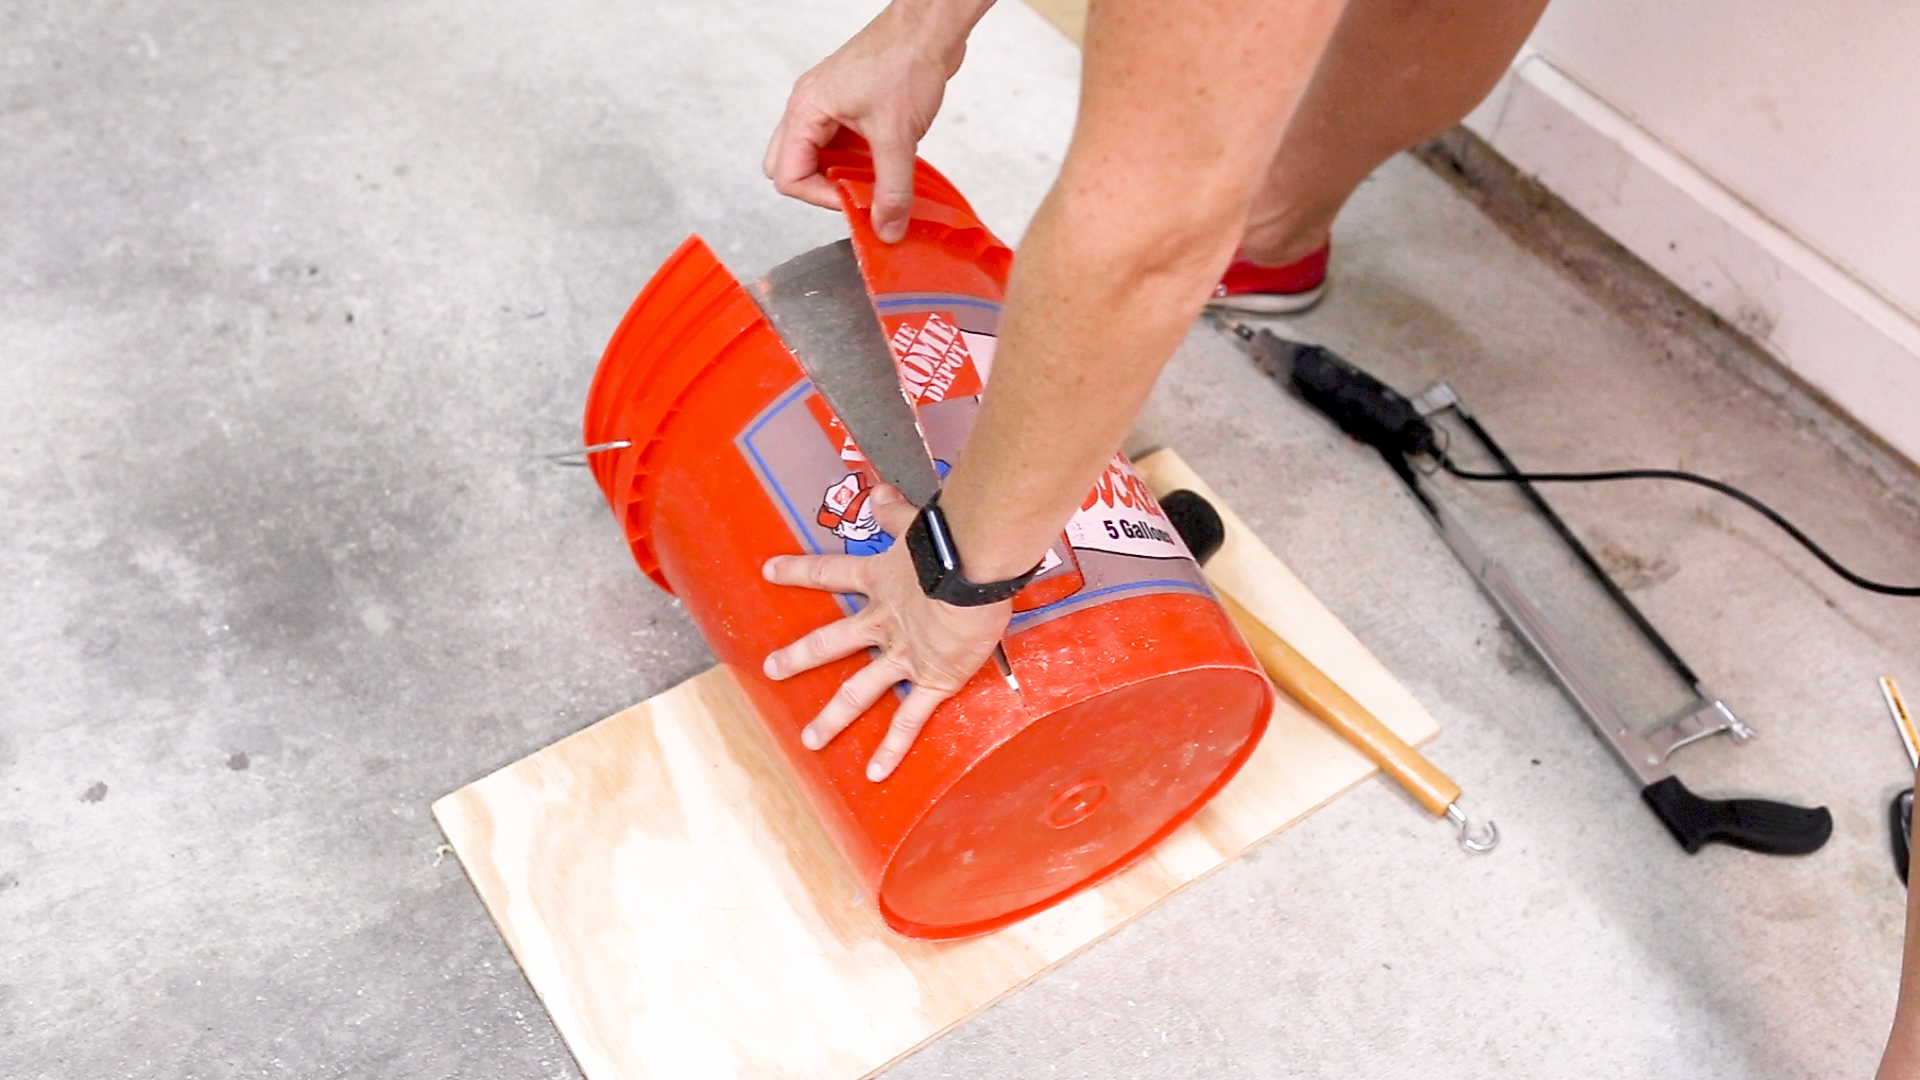
After letting the concrete cure for 48 hours, I pulled the inner tube out

I then carefully made a cut down the side of the bucket with my Dremel

I then left it alone to dry out for a few days

I got these heavy duty Anti Skid Pads to add to the bottom for protection

I didn't want to use the screws that were provided. Instead I used adhesive rated for concrete and I glued them to the bottom
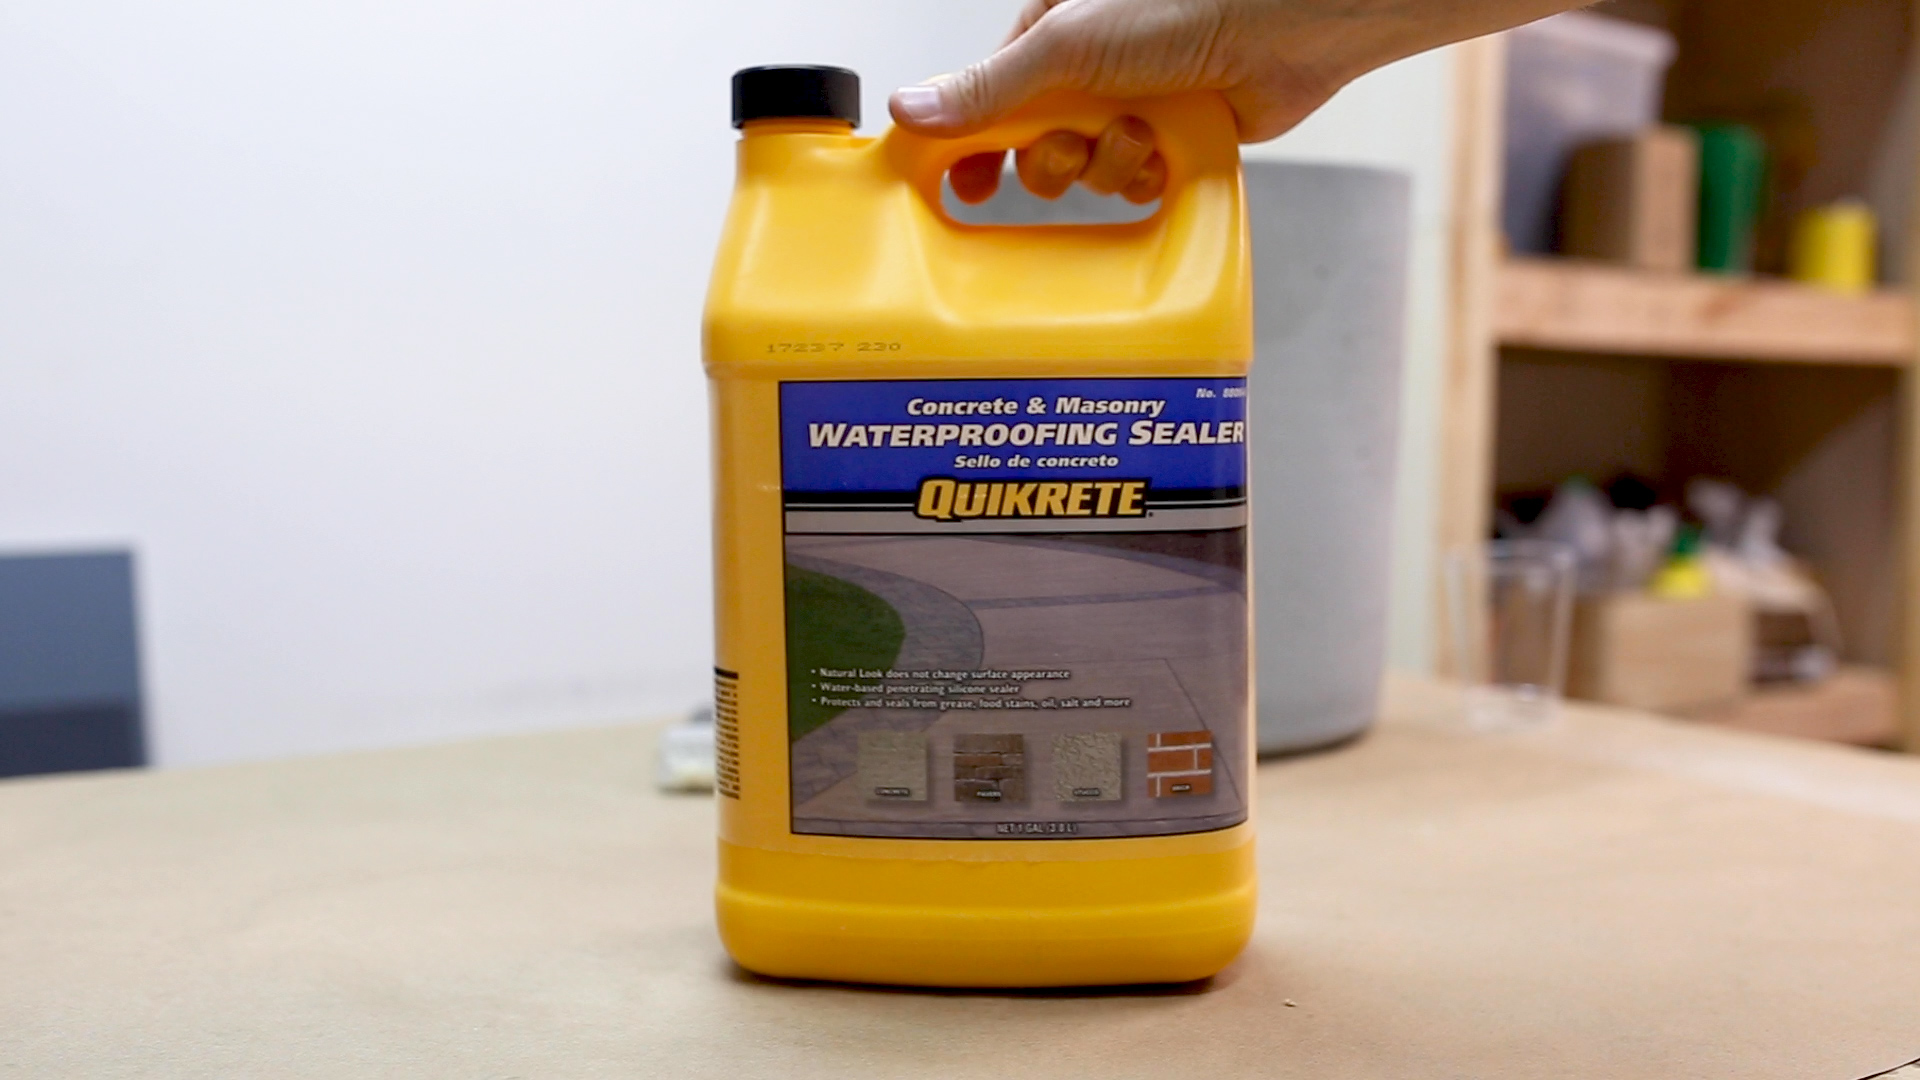
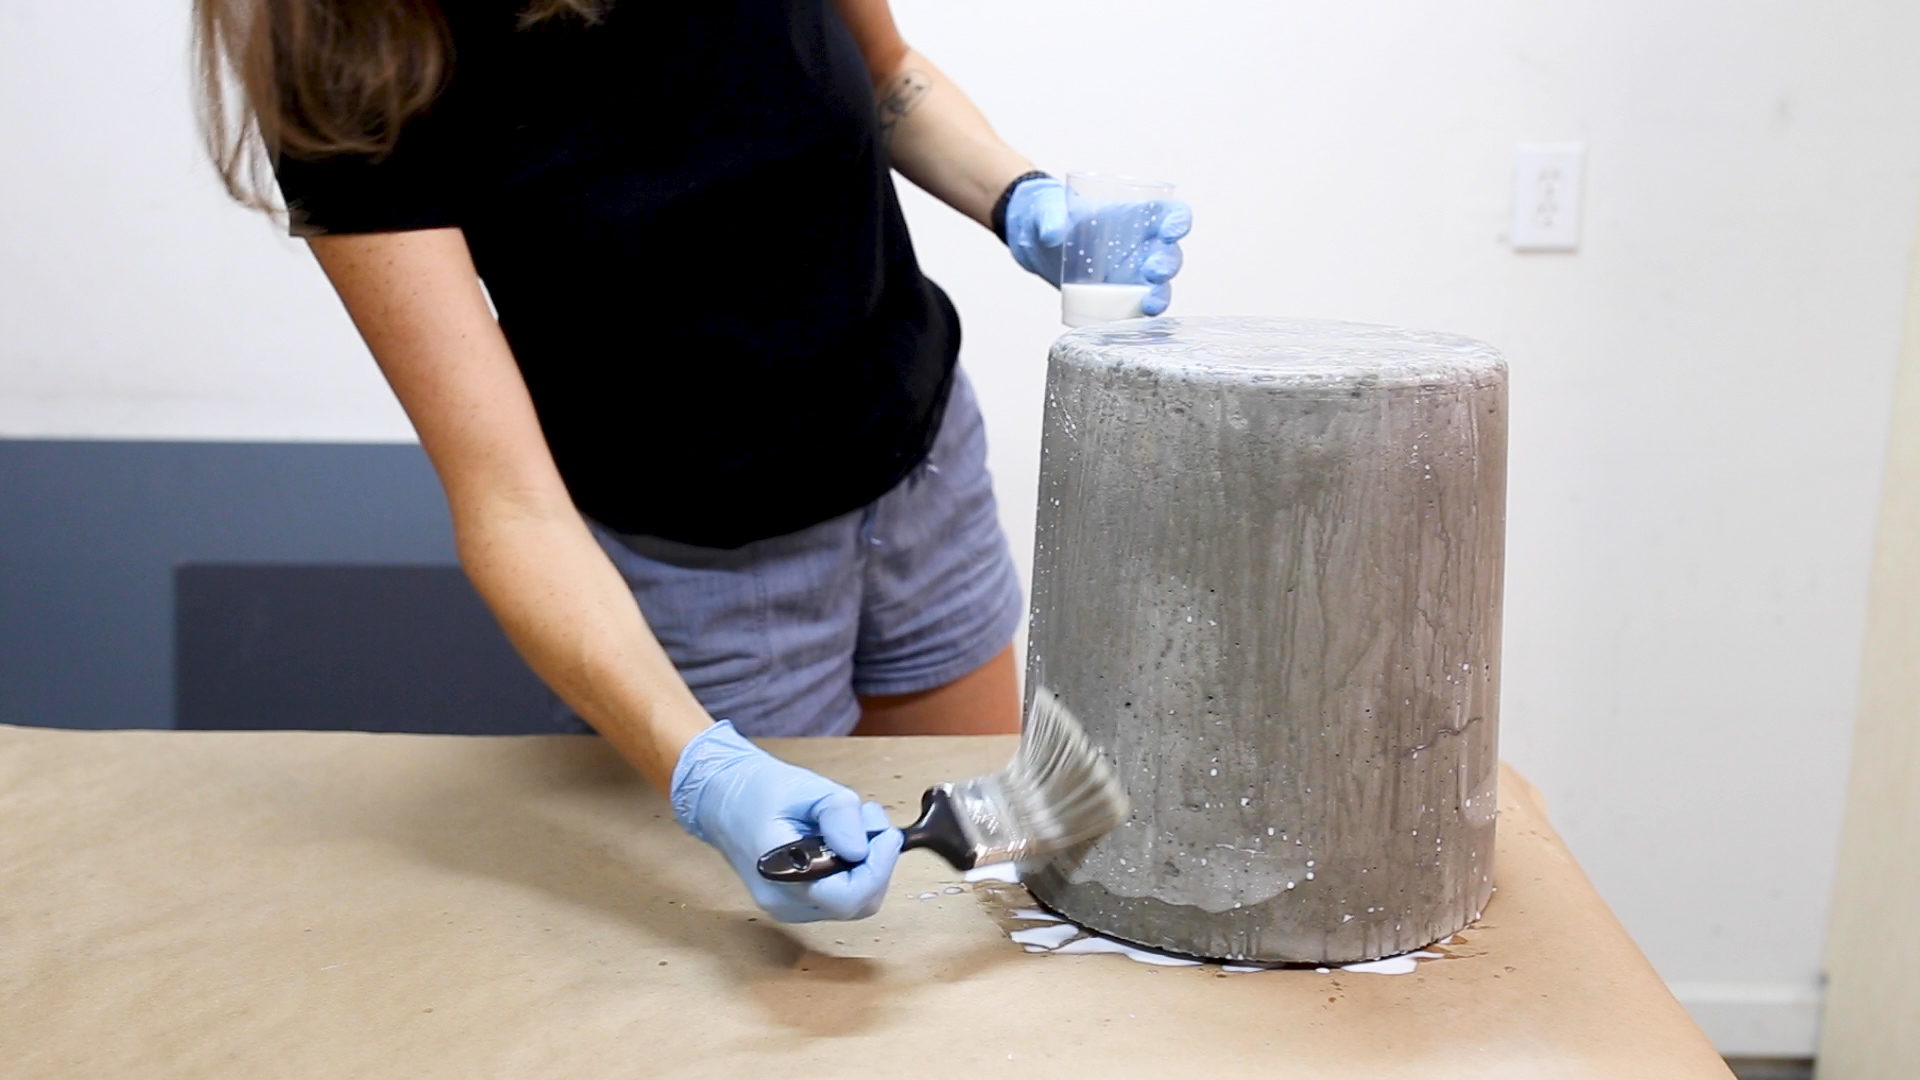
And lastly, I gave the whole piece a couple coats of Concrete Sealer
And that's it! Super easy! And very inexpensive to make.
I made this little side table to put between two chairs on my outside patio. But after making it, it's obvious that it could be used for a variety of uses. I might make another for a plant stand inside.
For more detailed instructions on the concrete table, be sure and watch the video. I'd love to see pics of yours if you decide to make your own.
If you liked this project and want to stay up to date with what I’m building, then be sure to sign up for my emailed newsletter and you’ll get an email when I post something new. See you soon!
You can find me on Instagram @makergray