

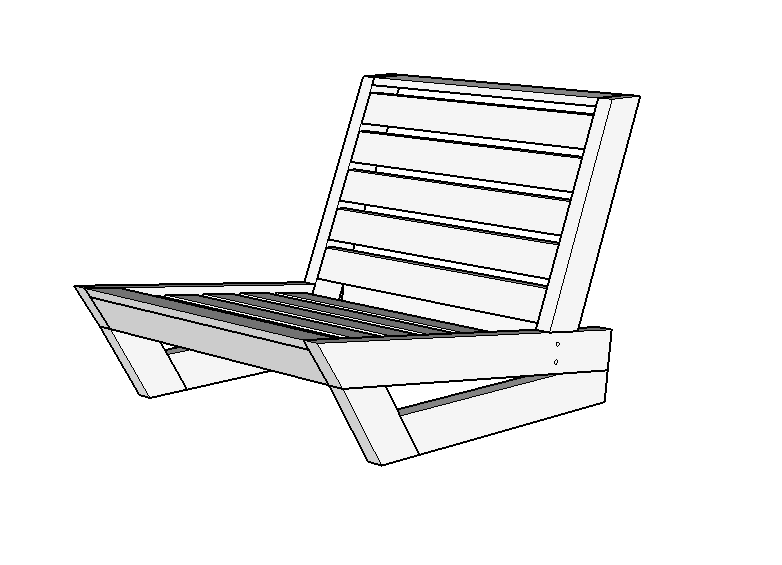
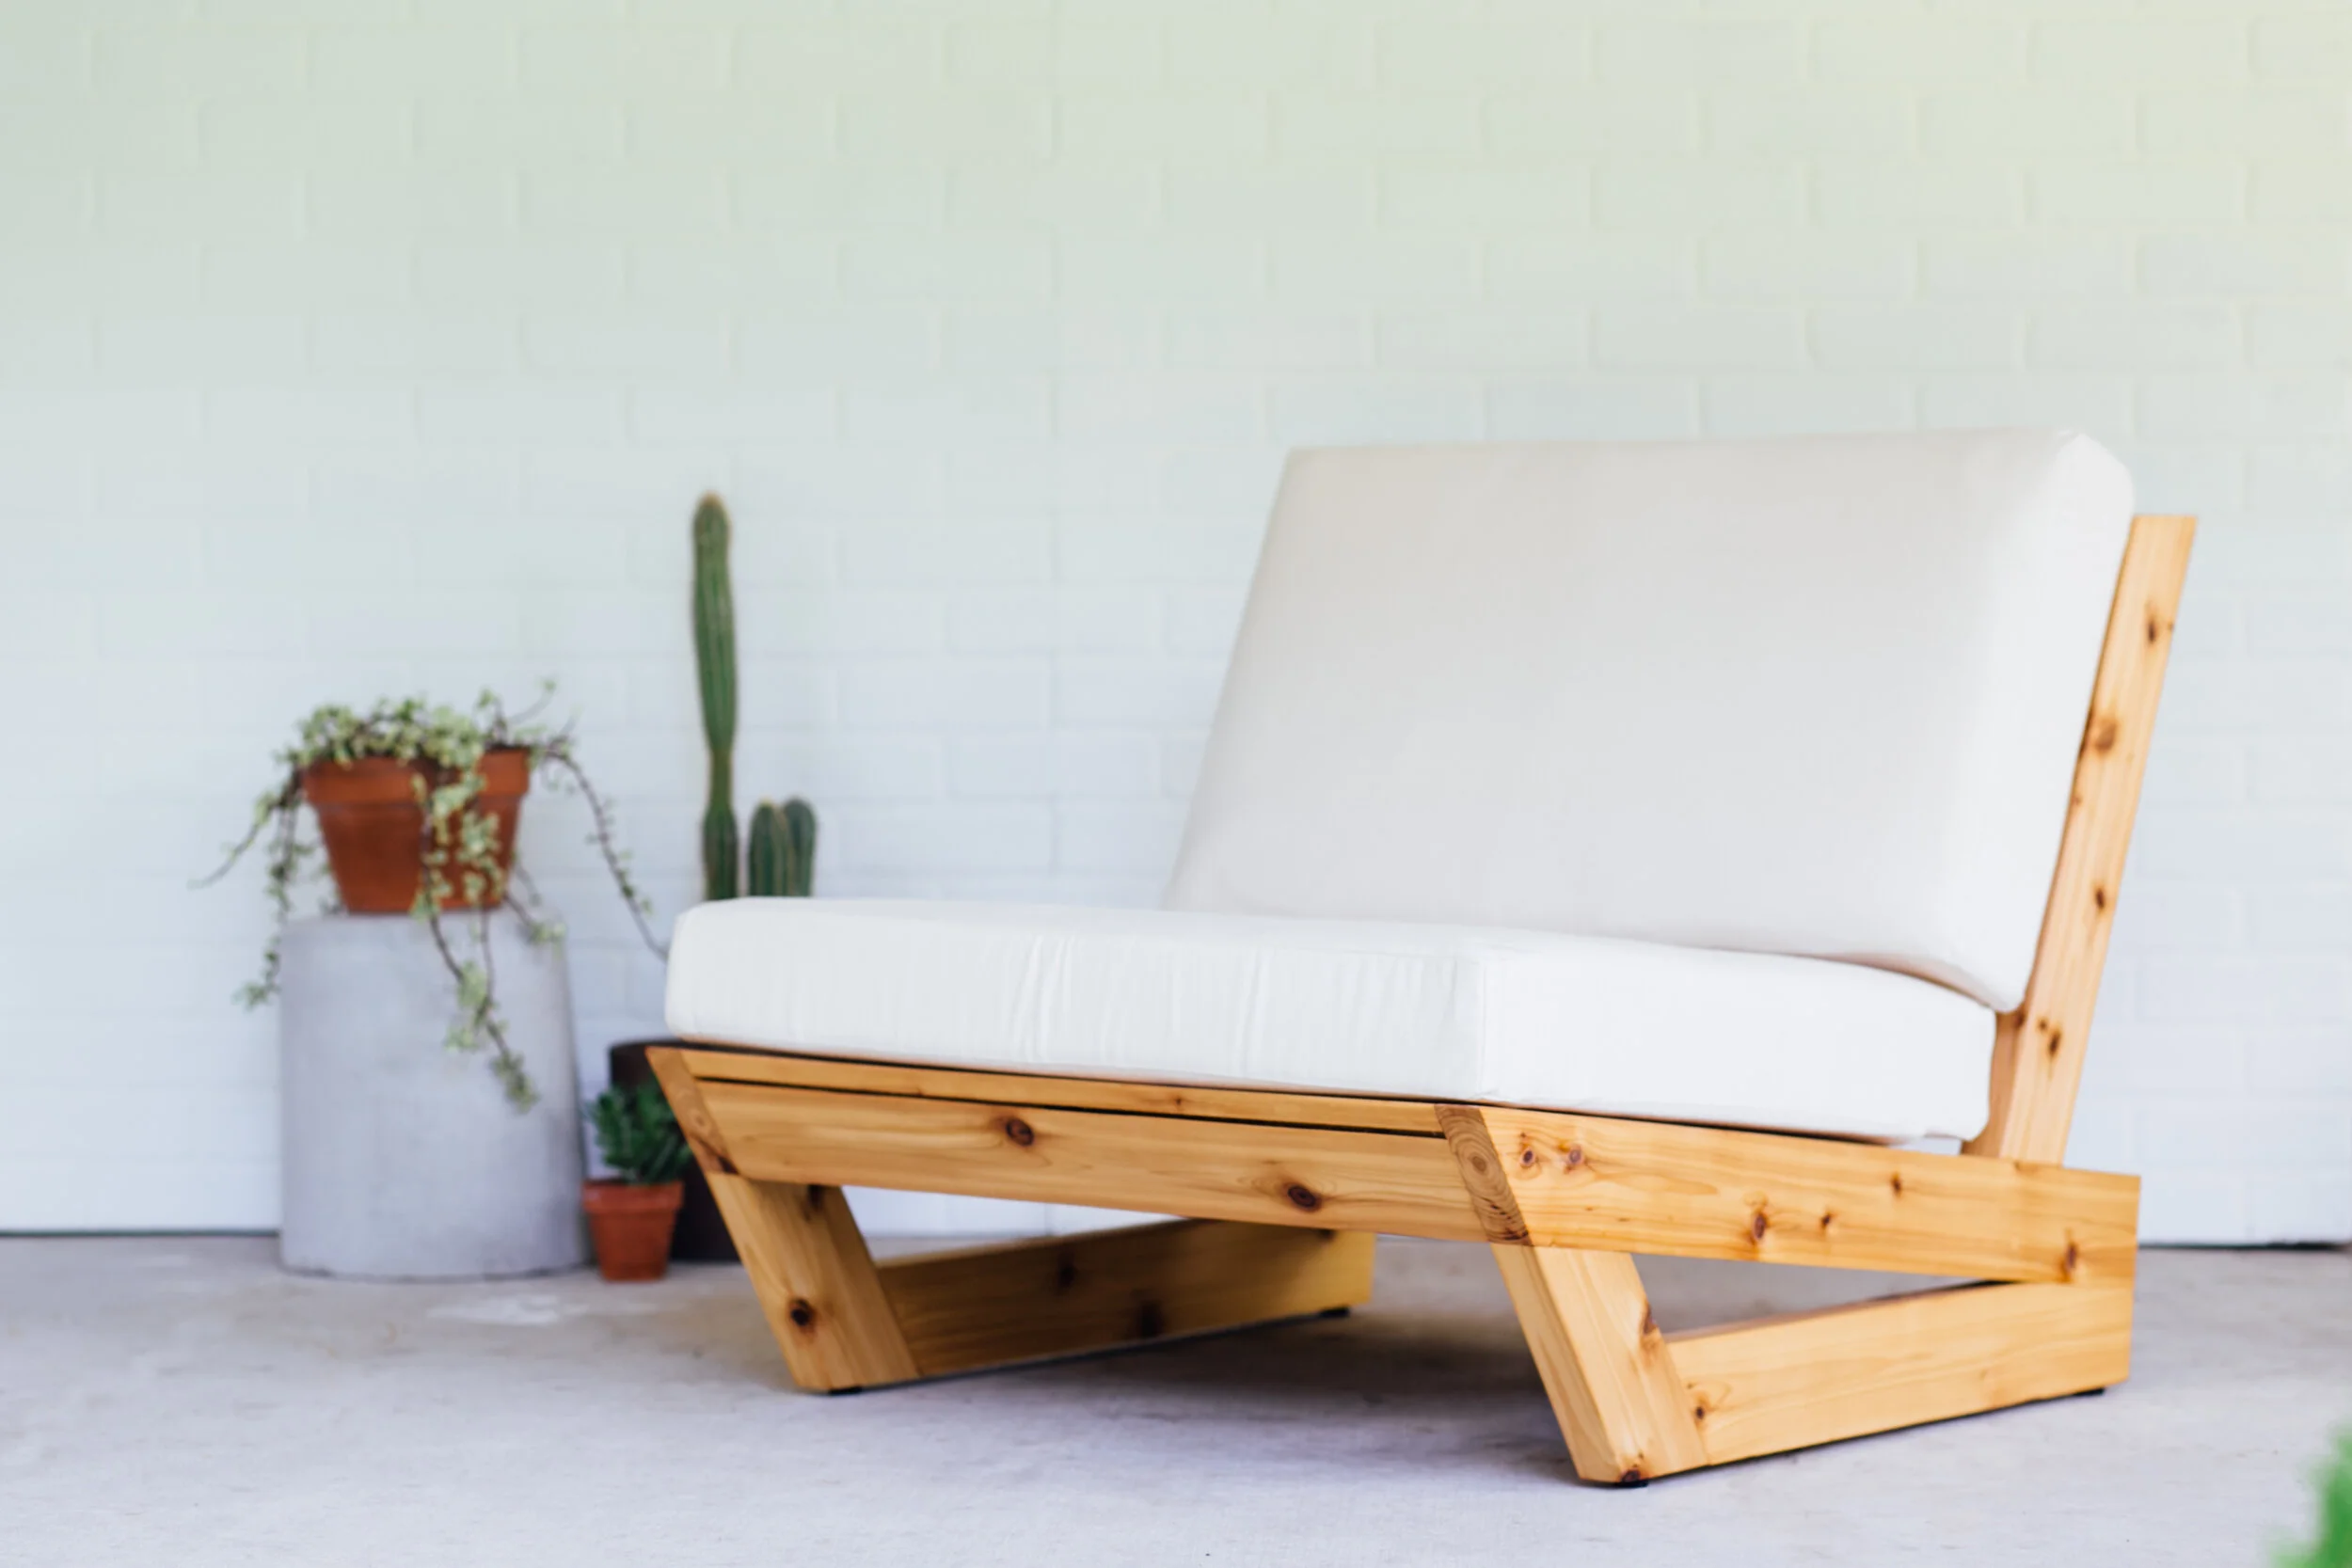
DIY Modern Outdoor Lounge Chair
I’m so excited about this project! Today I'm showing you how to build an Outdoor Lounge Chair made of cedar from your local home center. This chair would also make an awesome indoor chair.
I saved so much $$$ making this myself, and I LOVE it.
Be sure to check out the video tutorial above and read below to see how I did it. I also have build plans and templates available for this build.
Materials and Tools I Used:
Mini Pocket Hole Jig (less expensive)
This chair is deep and is meant to be used with cushions, as the back cushion makes up for the depth.
I had cushions made for my chair. Here are the dimensions:
seat bottom: 30” wide x 26” deep x 4” tall
seat back: 30” wide x 17.5” tall x 4” deep
Some bought cushion options:
Target has a few good options! Search “deep outdoor chair cushions”
Cushion Covers: https://bit.ly/3geeUyo (these are a great choice if you are interested in getting your own foam from a fabric store and cutting it to size for the inserts)
Deep cushion work best for this chair because of the seat depth.
Click here to get the build plans:
I also offer templates, to make the build process of cutting the angles even easier
The frame for this chair is gonna be made from cedar 2x4s. I chose cedar because this is an outdoor project and cedar is naturally resistant to water and rot. It’s also a light wood in weight and I love the way it looks.
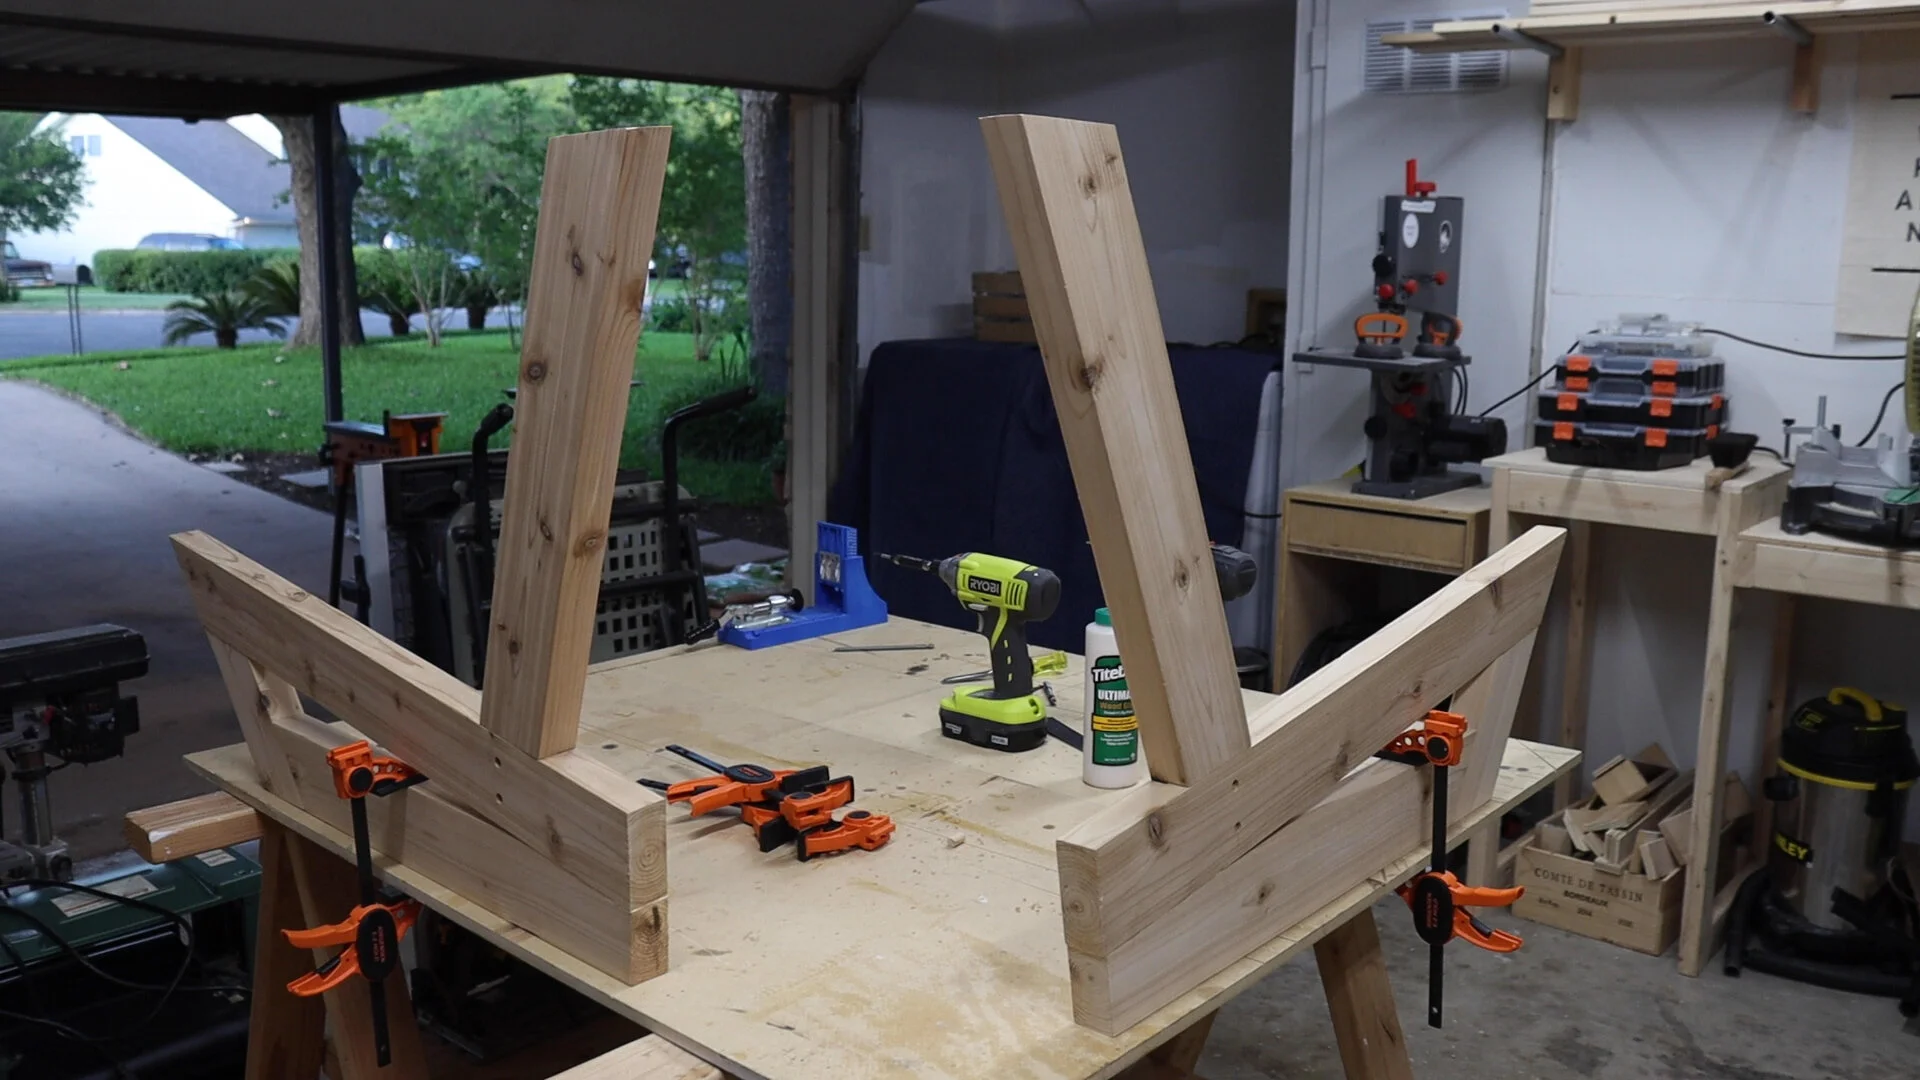
I started by cutting all of my leg pieces. I cut 2 of each of the 3 base pieces to make up the two legs.

If you’re interested in building this chair yourself, I have a link to the build plans in the box above, which includes a full material and cut list.
I used a digital protractor and lined out my angle for the first base piece. And then I cut that angle with my track saw. You could also easily use a circular saw.
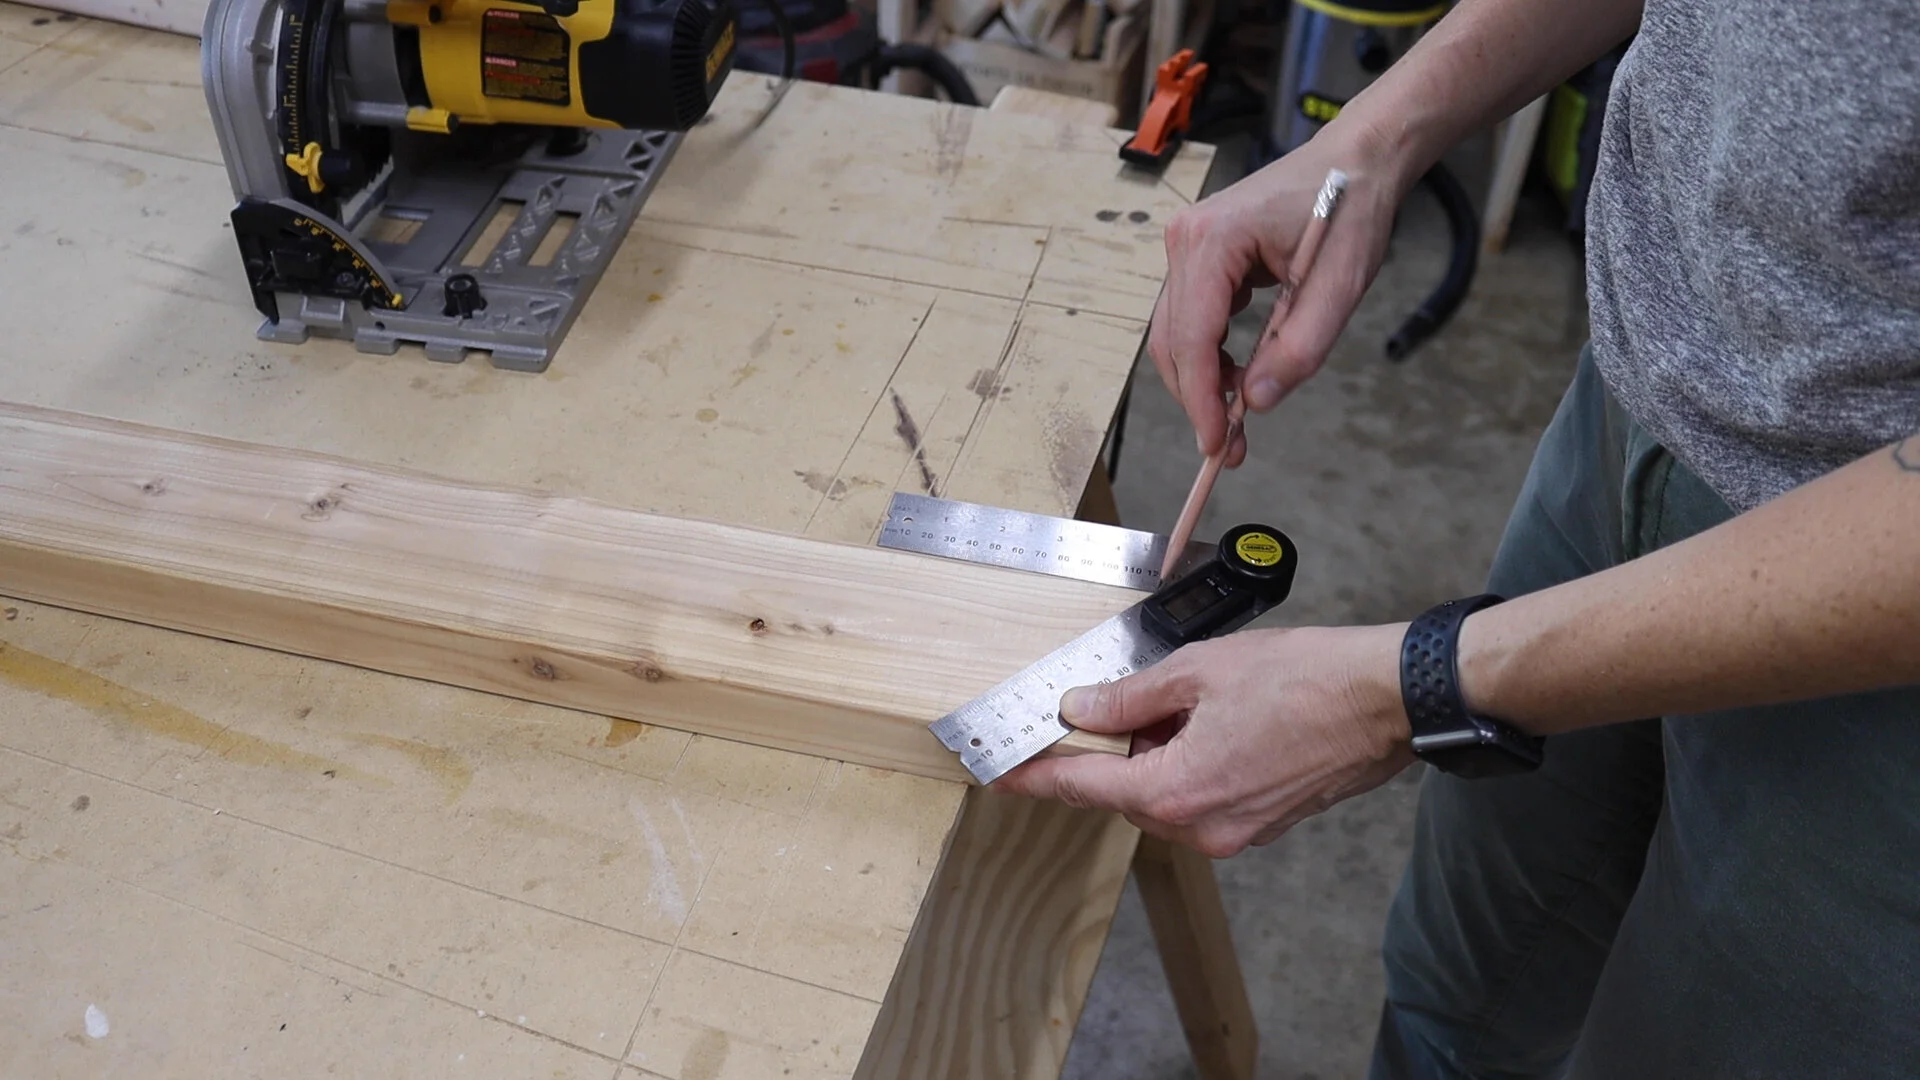
I continued finding all of the remaining angles for the leg pieces and then cut them with my track saw. And again, I have build plans to help you with these angles.


Before I can glue up the base legs I need to make the cuts for the seat back side supports to fit in. To make this joint a little bit stronger and get the look I’m going for, I’m using a half lap joint. This means I’m going to remove half of the material from both of the members so that they overlap and join.

I set my circular saw to the correct depth and then clamped the two members together so I could cut them to the same width at the same time.

And then I made many passes and cut away the bulk of the material. I used a scrap piece of wood in front of where I was cutting so I had a flat surface for the bed of my circular saw to rest on. It also helps prevent tear out.

You won’t be left with a perfectly clean joint, but a chisel will help clear any rough spots out.

And you can see here how the two pieces now fit together.

Now let’s put together the base.
To avoid screws showing on these first two pieces, I’m gonna screw them together from the bottom.
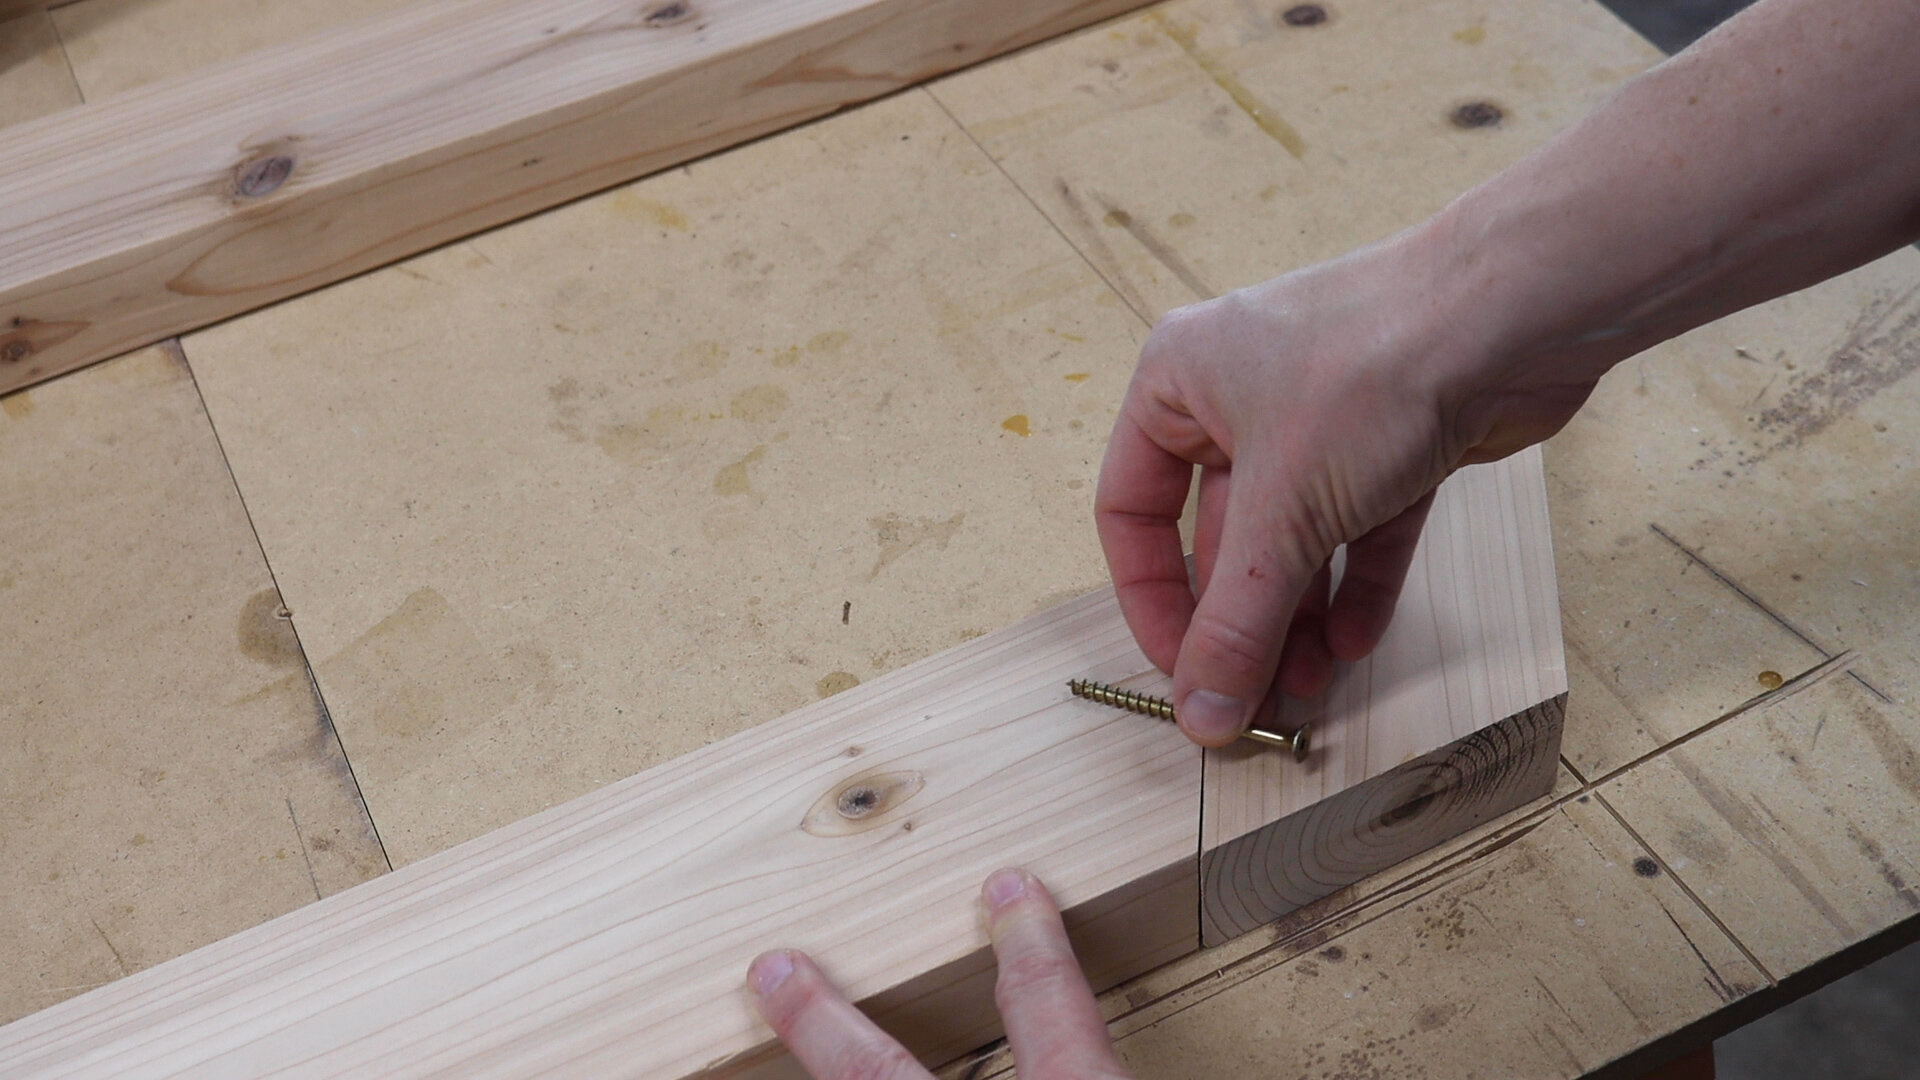

Then I screwed the two pieces together. I’m using an exterior rated waterproof glue throughout this project since these are outdoor chairs.


To join the next two boards, I used pocket holes that will be hidden under the seat slats.

And then for the last two pieces, I again recessed and screwed in from the bottom.

With the base legs done I can now attach the seat back side support. It slides right in like this:


I grabbed my 3/8ths inch forstner bit and drilled about a half inch into the wood. I’ll be gluing and screwing this half lap joint together but I’m using this bit to recess my screws.

Then, I added wood glue, clamps and then screwed my pieces together.


I repeated all the steps to make both sides of the chair.
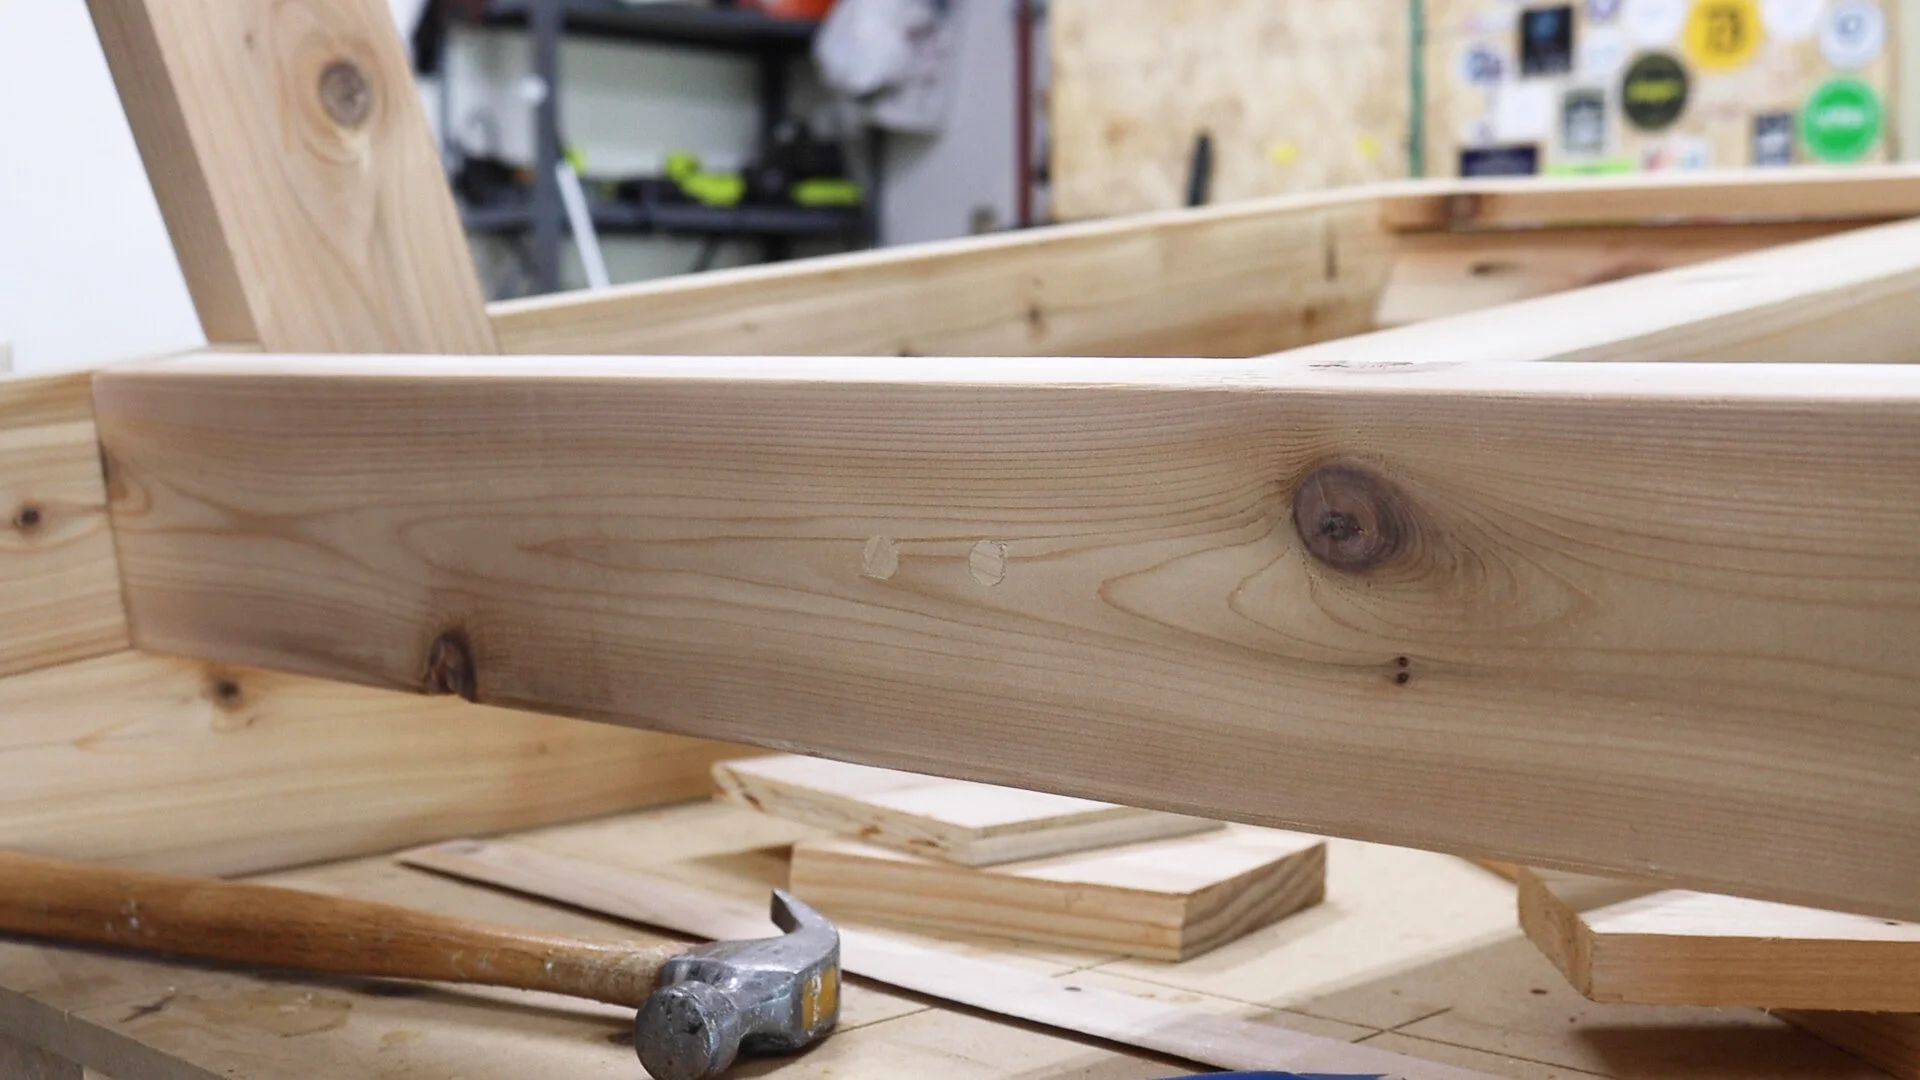
To fill the recesses, I’m using this 3/8th’s tapered plug cutter. This way I can cut plugs from the same cedar I built with. And alternative would be to just buy a cedar dowel.


I then added some glue and then knocked in the plugs. I recommend paying attention to the orientation of the grain of the dowels. It looks best if the plug grain is running with the grain of your board.

I sawed the plugs flush with my flush trim saw.

I repeated the steps for the other side and then I cut a back stretcher to attach the two sides together. This board will be attached using pocket holes.

The front stretcher has a unique angle of 50 degrees, and my table saw will only cut to 45 degrees. So my fix for this was to tilt my blade to 5 degrees and cut a small wedge off of one side of a scrap board. Then I taped the wedge to one side of my stretcher. Now, with the extra 5 degree slant, I can now tilt my saw blade to 45 degrees and get a 50 degree cut.
This is even better explained in the build video.


With the cut made I then added some pocket holes and glue and screwed it into place.

The top stretcher had a simple angle, so no fancy cuts necessary. And I just repeated the process of pocket holes and glue.

The seat slats are all going to be the same size, so I set up a stop block with a clamp at my miter saw station and made a bunch of repeatable cuts.
The only slat that will be different is this first one that will match the angle of the front.

I trimmed the angle with the table saw but couldn’t get underneath it to screw it in. So I added glue and clamps and left it alone to dry overnight, which will dry plenty strong.

The next day I added pocket holes to the back of my seat slats and then started adding the slats in. I used glue and screws and used a scrap of wood for my spacer between the boards.


The bottom seat slats are going to need a center brace for extra support. I used a cedar 2x4, cut the front angle and then set it into place.

I again used my off cut to get the depth of how far down the brace should sit.

To secure the brace from the back side, I’m again going to recess screws. This time I decided to use my pocket hole bit to drill the recesses. However, this bit did not make a clean cut (terrible tearout). So for the second recess, I went back to my 3/8ths forstner bit, which made a much cleaner cut.

I then pre-drilled, drove in screws and then added more cedar plugs, just like before. By the way, you don’t need to recess and plug screws. I just personally like the way this looks.
With the center support in I could start adding the rest of the seat slats. I continued my method of gluing and screwing them using pocket holes from underneath, and a scrap wood spacer.


To protect the bottom of the chair, I’m adding these rubber furniture feet.


These will add general protection. But I also like the idea of them propping the chair just a tad off the ground, so it doesn’t sit in water when it rains.
The last thing I did before adding finish was to use a sander and round over this sharp corner on the front of the chair.

For a finish suitable for exterior use, I’m trying a mixture of 70% teak oil and 30% spar urethane. I learned about this mixture from Izzy Swan’s YouTube channel. You leave it for about 5 minutes and then wipe it off. I did two coats.
My chairs are going to be under a porch and not directly exposed to the elements, so I feel that this is a good enough finish for my chairs. However, if you have outdoor furniture exposed to sun and rain, you might want to go with an even tougher finish.

And that’s it!


For detailed instructions on this DIY Bed Platform, be sure and watch the video.
I'd love to see pics of yours if you decide to make your own.
See you on the next project.
Click here to get the plans:

Follow Maker Gray:
Instagram @MakerGray https://www.instagram.com/makergray/
Facebook https://www.facebook.com/MakerGray/
TikTok: https://bit.ly/3lXgdHh
If you liked this project and want to stay up to date with what I’m building, then be sure to sign up for my emailed newsletter and you’ll get an email when I post something new. See you soon!
(Most of the links listed above are affiliate links. As an Amazon Associate I earn from qualifying purchases. I super appreciate your support for Maker Gray in this way)