
Basic Woodworking Terms for Beginners
A Friendly Guide to Build Your Confidence

If you're just getting into woodworking or DIY home projects, you're bound to come across terms that sound like another language: Pocket Holes? Kerf? End grain? This guide breaks down the most common woodworking terms so you can understand instructions, shop with confidence, and communicate like a pro. Whether you're building furniture, tackling home improvement, or following along with my tutorials, this is your glossary of go-to lingo.
LUMBER TERMS
Hardwood vs. Softwood
Hardwoods come from deciduous trees (like oak, maple, and poplar) and tend to be denser and stronger.
Softwoods come from coniferous trees (like pine, fir, and cedar) and are generally lighter and easier to work with.
Dimensional Lumber
When you buy a board labeled “2x4” at the store, you might expect it to be exactly 2 inches by 4 inches. But it’s not!
That number is called the nominal size — it’s the rough size the board was before it was dried and smoothed. The actual size is smaller because of that processing.
So a 2x4 actually measures 1.5 inches by 3.5 inches.
And a 1x6 is actually ¾ inch by 5.5 inches.
Nominal vs. Actual Size
Nominal size is the name of the board before it is dried and planed.
Actual size is the true measurement after processing. Always double-check actual measurements before cutting or planning your layout.
S4S / S2S / RGH
These terms describe how much the lumber has been milled or “dressed” (smoothed and squared) before you buy it.
S4S (Surfaced on Four Sides):
The board has been planed smooth on both faces and both edges. It’s square, flat, and ready to use — great for beginners and most DIY projects.
S2S (Surfaced on Two Sides):
The faces (top and bottom) are smooth, but the edges are still rough from the sawmill. You’ll likely need to trim or joint the edges before using.
RGH (Rough Lumber):
Completely unfinished and still in its raw state. You can often see saw marks on the surface. It requires tools to flatten and square it before use — better for advanced woodworkers or when you want full control over your dimensions.
Grain, Face, Edge, End Grain

Grain: The pattern created by the tree’s growth rings. It affects strength and beauty.
Face: The wide, flat surface of the board.
Edge: The narrow, long side of the board.
End grain: The exposed grain at the end of a board.
Kiln Dried (KD) vs Pressure Treated (PT)
Kiln Dried lumber has been dried in an oven to reduce moisture.
Pressure Treated lumber is infused with chemicals to resist moisure rot and bugs—used for outdoor projects.
Common Defects
Cup: The board curls across the width.
Twist: Opposite corners rise or fall.
Bow: The board curves along its face.
Check: A crack that doesn’t go all the way through.
Split: A crack that goes all the way through.
Board Measuring
Linear feet: Measures length only of a board
Board feet: A board foot is a unit of measurement used to describe the volume of a piece of lumber. It’s most commonly used when buying hardwoods (like oak, walnut, or maple) from a lumberyard. While linear feet measures length, board feel measure volume.
Board Feet calculation formula = (Thickness [in] × Width [in] × Length [in]) ÷ 144
Example:
Let’s say you have a board that’s:
1 inch thick
6 inches wide
48 inches long
Then:
(1 × 6 × 48) ÷ 144 = 2 board feet
PLYWOOD
Plywood
Made by gluing together thin layers (plies) of wood, each turned 90° for strength and stability.
Construction-grade: Rougher surface, fewer plies.
Finish-grade: Smoother surface, often hardwood veneers.
Baltic Birch: Premium quality plywood with many plies—very flat and stable.
Plies
The number of layers in a sheet. More plies = more strength.
Veneer
A thin slice of wood glued to a surface (like plywood or particle board) for a decorative finish.
Edge Banding
A thin strip used to cover the exposed edge of plywood or veneered boards for a clean look.
MEASURING & MARKING
Square (the term)
Describes a 90° angle.
Also refers to tools used to check and mark right angles.
Types of Squares
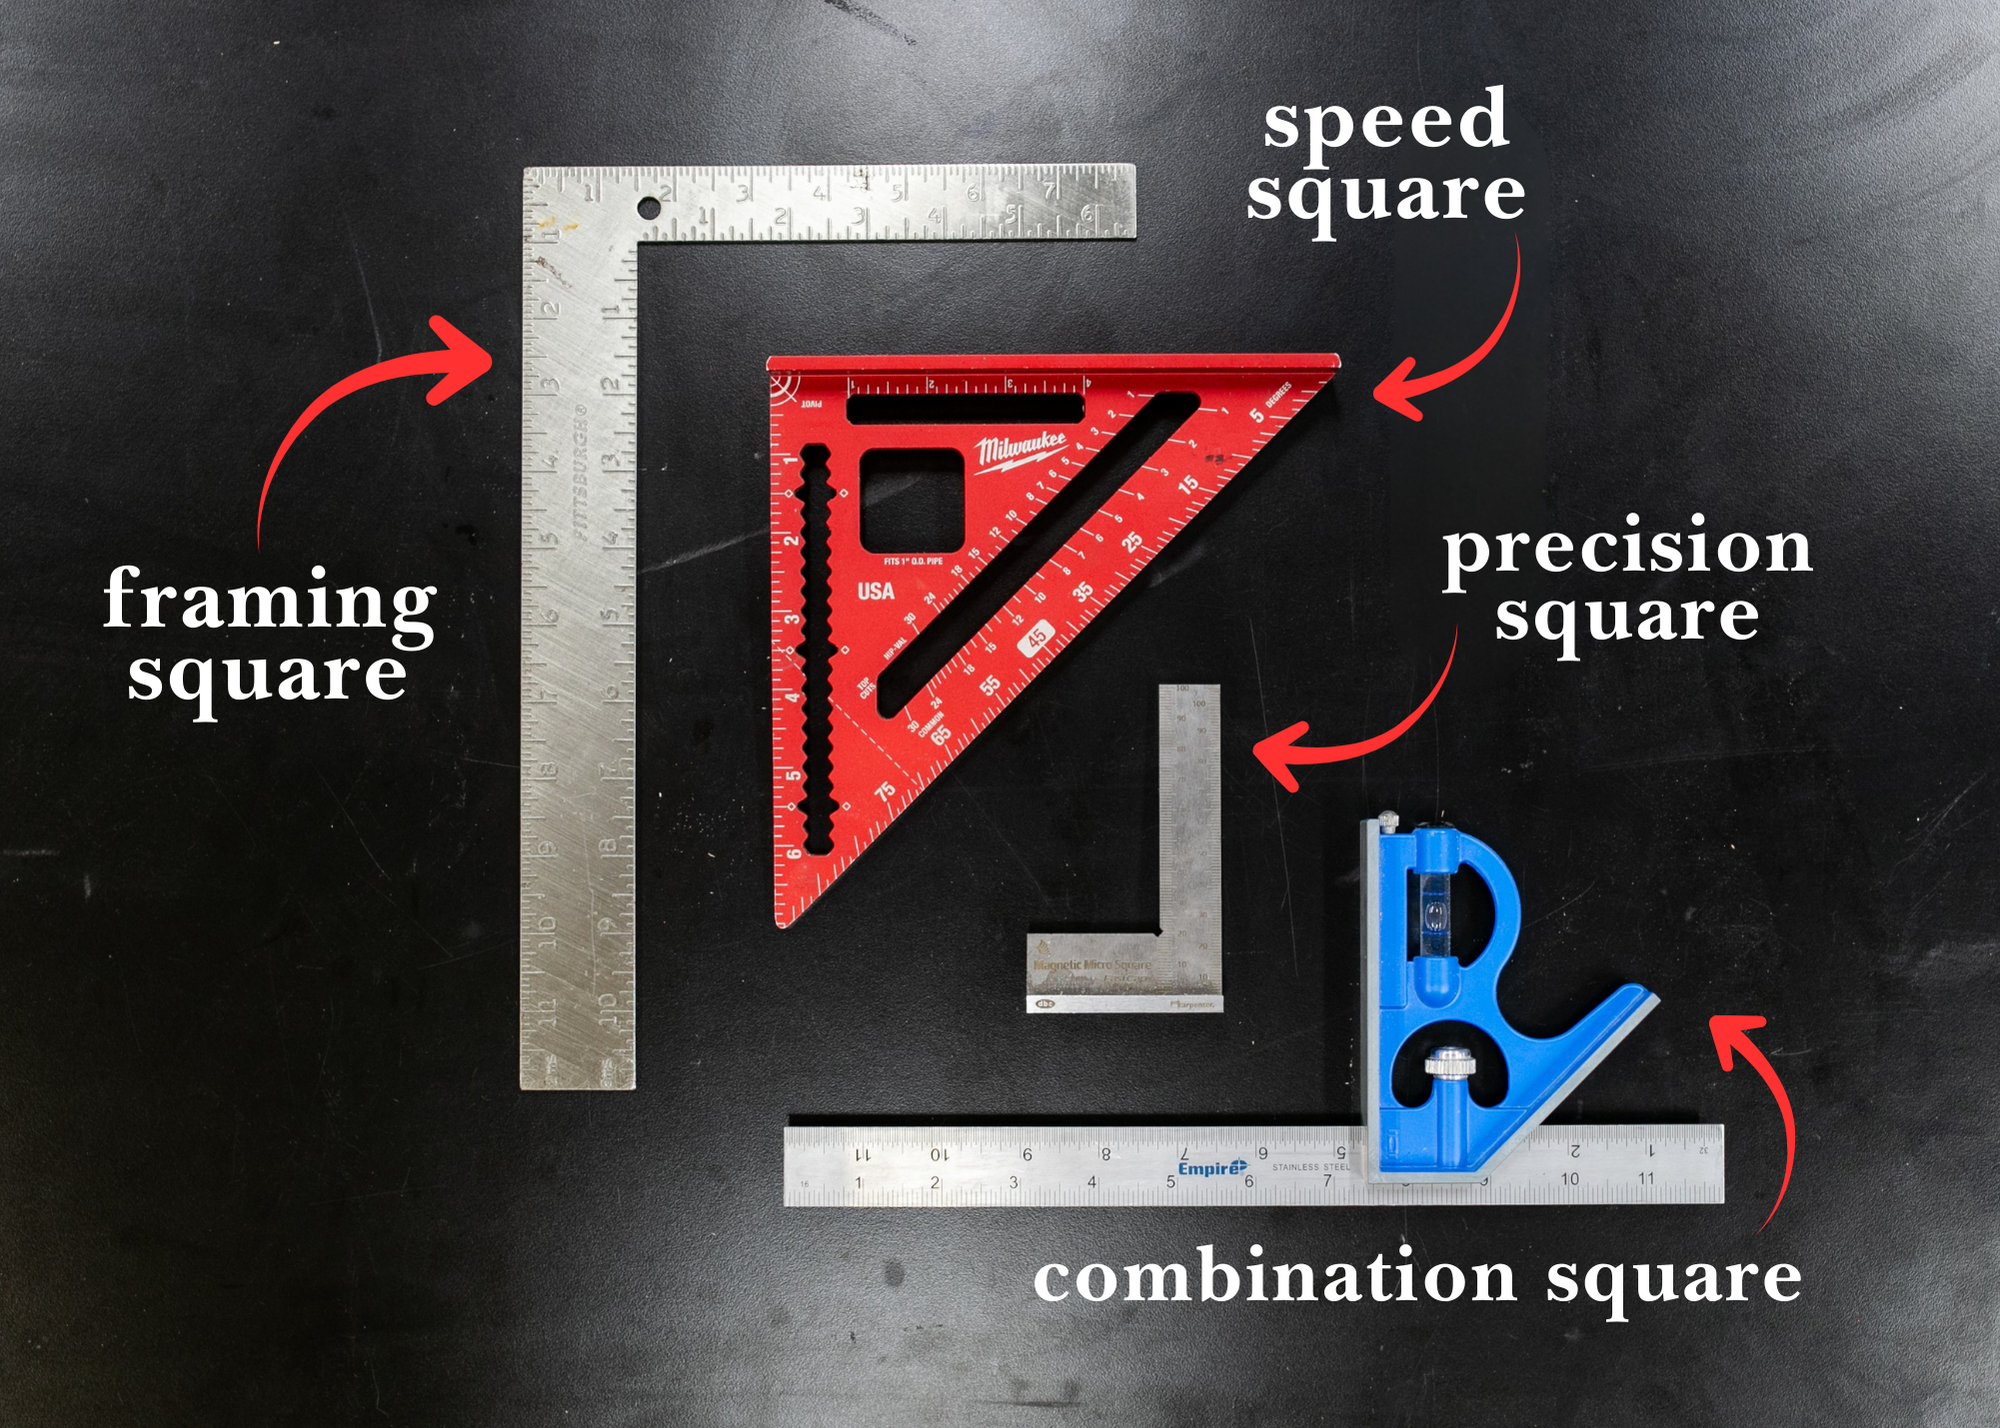
Speed Square: Quick layout tool for framing and angled cuts.
Combination Square: Adjustable, good for layout and depth marking.
Framing Square: Large and used for verifying square assemblies.
Precision Square: Fixed, very accurate.
Straight Edge
Any tool or material with a perfectly straight side—used to mark or check straightness.
Tape Measure
Your go-to for measurements. Comes in various lengths. I recommend at least 16'.
Marking Tools

carpenters pencils
Carpenter’s Pencil: Flat so it won’t roll off your bench.
Mechanical Pencil: Great for precision.
White Pencil: Easy to see on darker wood.
Layout
Refers to the process of measuring, marking, and planning your cuts or joins.
DRILLING & CUTTING
Kerf
The width of the cut made by a saw blade. Kerf can affect measurements, especially when making precise cuts. Always account for the kerf in your cut layout. Thinner blades = smaller kerf = more precise cuts.
Miter Cut
An angled cut across the face of the board, typically at 45°.
Cross Cut
A cut made across the grain. Often made with a miter saw or circular saw.
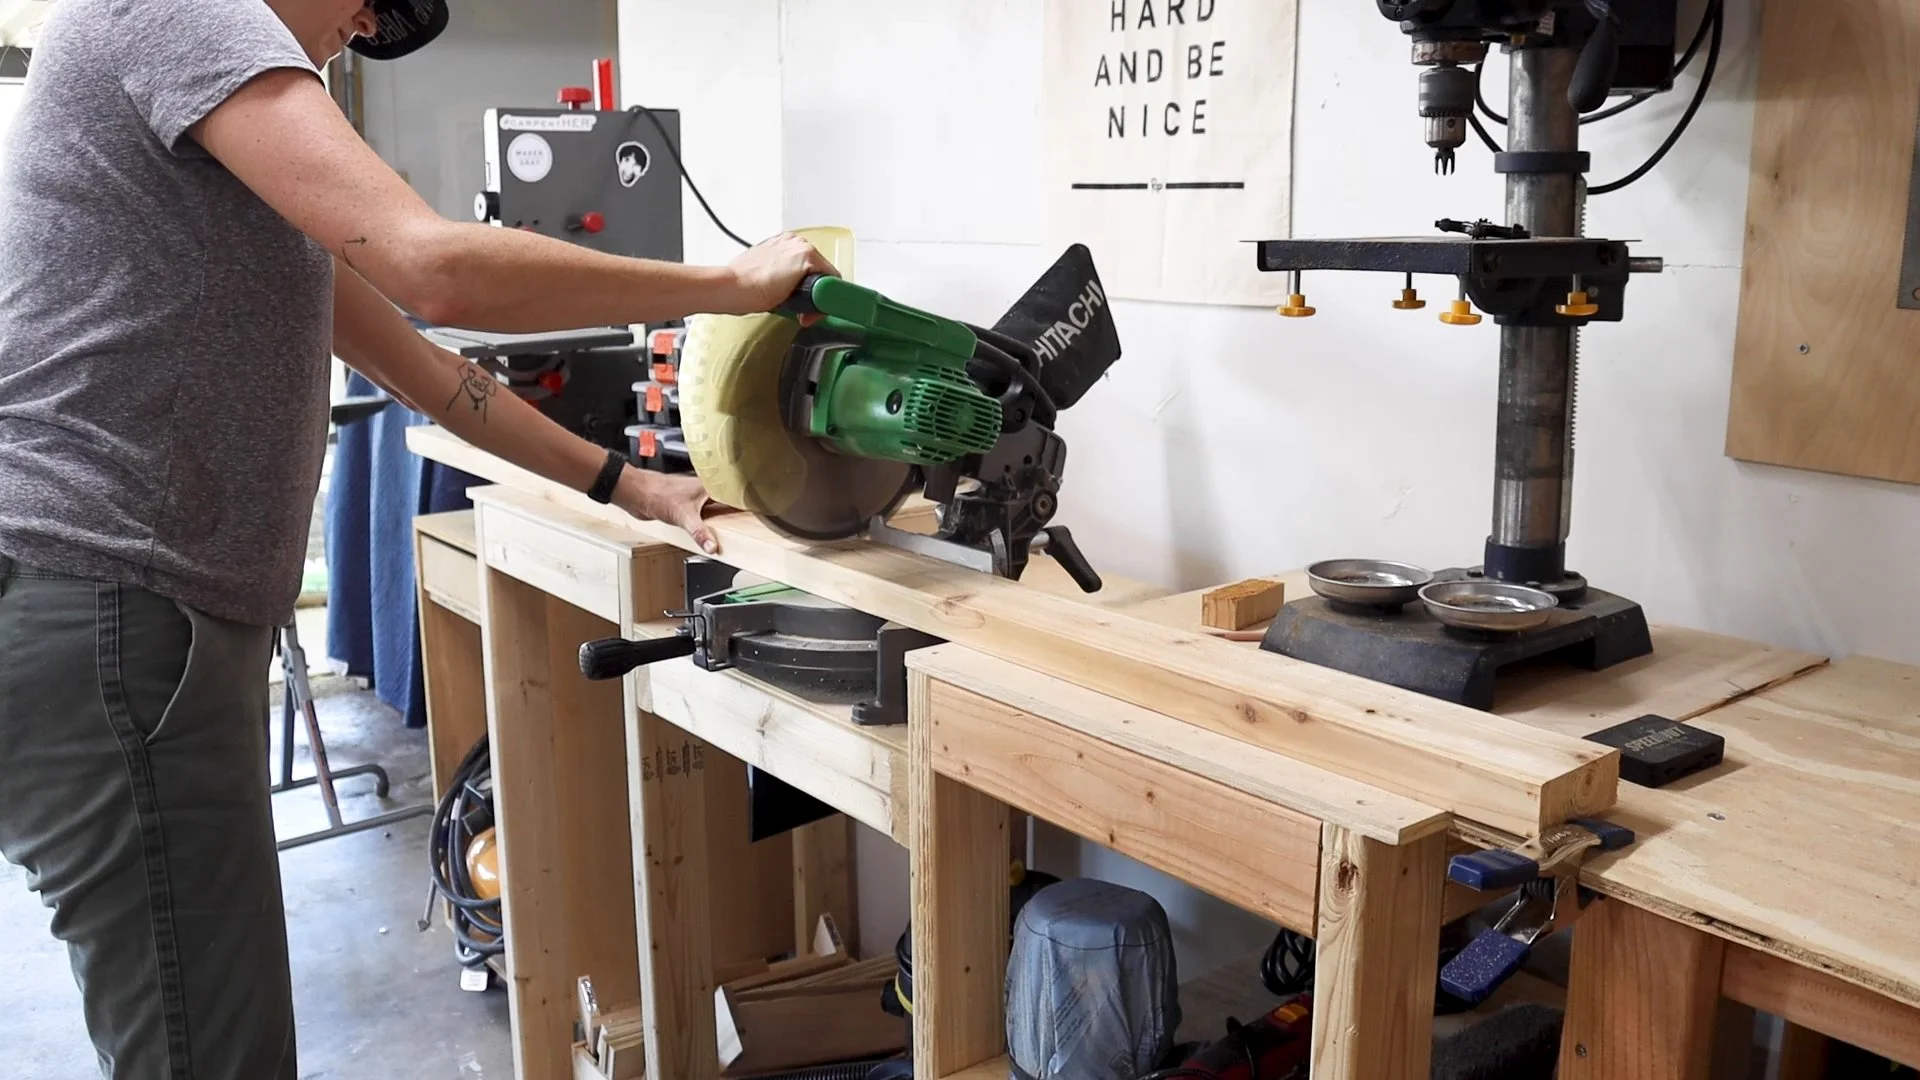
Making a cross cut across a 2×4 using my miter saw in my Outdoor Lounge Chair project
Rip Cut
A cut made with the grain.

Making a rip cut down a plywood board in my Plywood Storage Cart project
Bevel Cut
A angled cut made by tilting the saw blade to cut at an angle through the thickness of the board.

Bevel cut when making french cleats in my workshop organization project
Chamfer
A beveled edge cut at an angle, often 45°, to soften sharp corners.

Chamfered edge on my Modern Coffee Table project
Countersink
Drilling a conical hole so a screw head can sit flush or below the surface.
Pre-Drill / Pilot Hole
A small hole drilled before driving a screw to prevent splitting.
Pocket Holes
Angled holes drilled to join pieces of wood with screws. Often made using a Kreg Jig.
Forstner Bit
A forstner bit is a specialty drill bit used to bore flat-bottomed holes. Great for concealed hinges or large-diameter holes.


CLAMPING

Clamping parts for my Table Saw Lathe project
Clamps
Used to hold materials in place while cutting, gluing, or assembling.
Types of Clamps
Bar Clamp: Good for large glue-ups.
Quick-Grip Clamp: Fast one-handed operation.
C-Clamp: Small and powerful—great for tight spaces.
Spring Clamp: Lightweight and fast to use.
Corner Clamp: Holds two pieces at a 90° angle.
Pipe Clamp: Adjustable for long clamping needs.
JOINERY
Butt Joint
The simplest joint—just two boards butted together. Not very strong unless reinforced.
Dado
A groove cut across the grain to accept another board.
Rabbet
A notch cut along the edge of a board, often used in cabinet backs.
Dry Fit
Assembling pieces without glue to check alignment and fit.
OTHER HELPFUL TERMS
Workpiece
The piece of wood you're currently working on.
Workbench
A sturdy table used for building, sanding, and assembly.
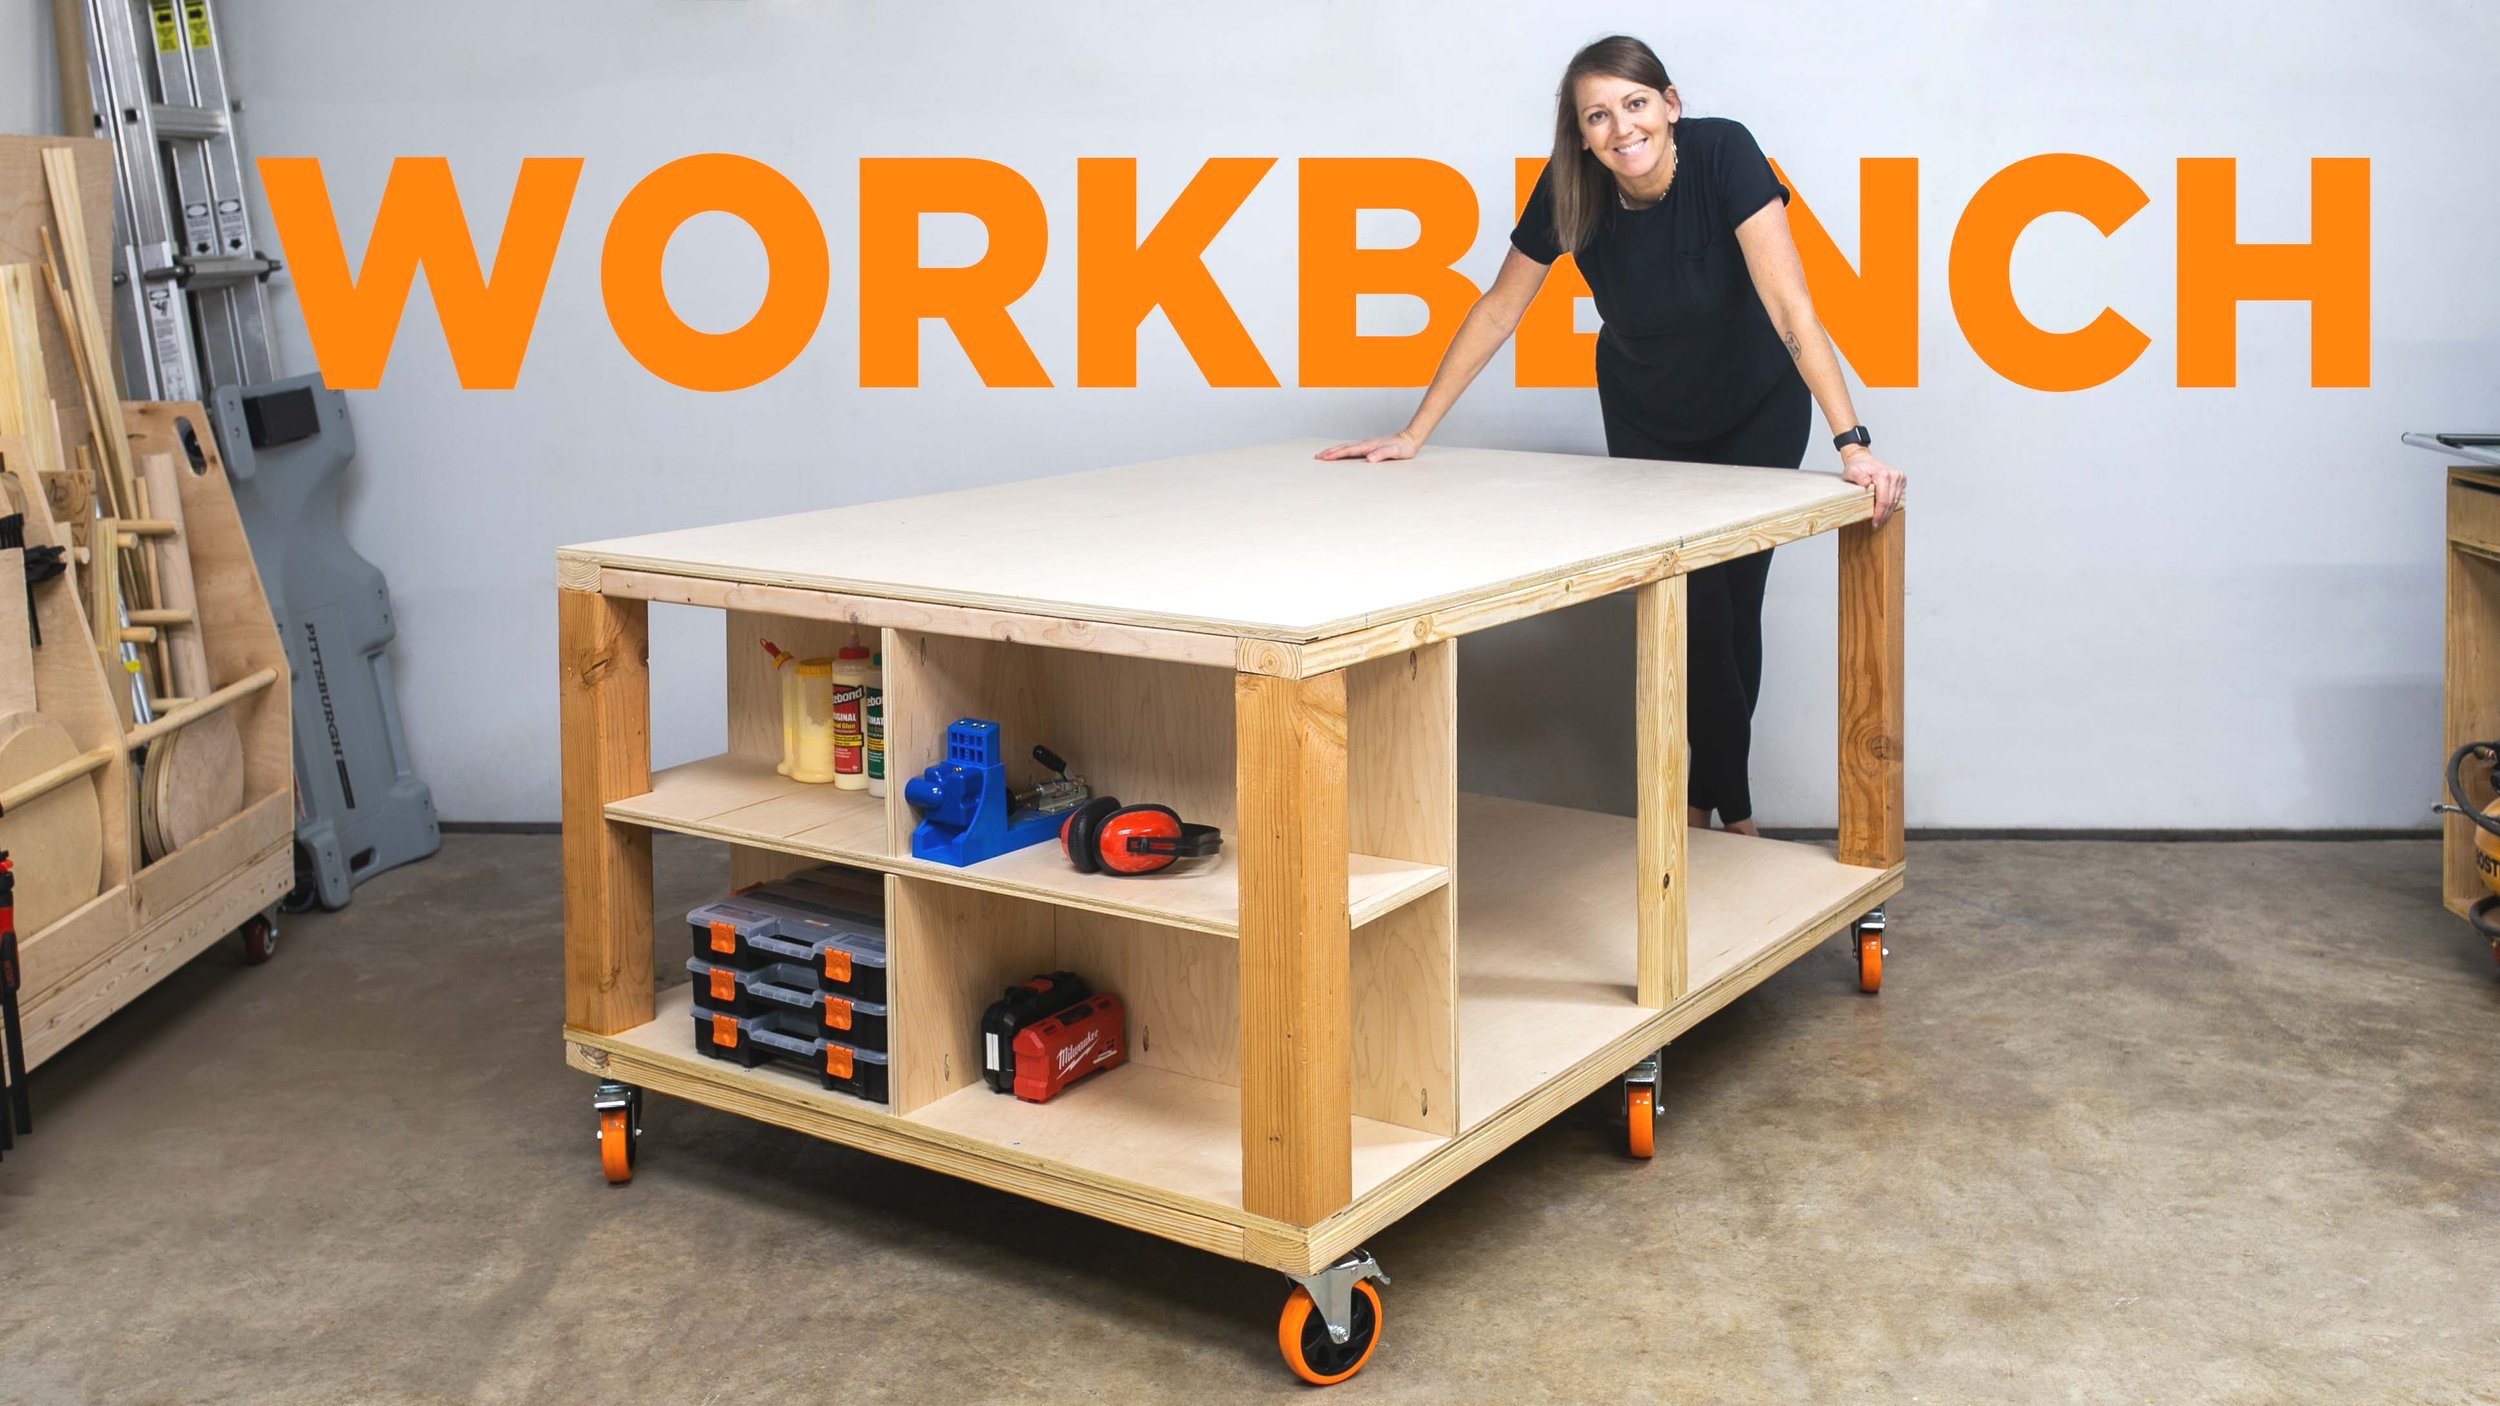
Build your own workbench like mine here!
Grain Direction
Refers to the orientation of the wood fibers in a board — basically, the direction the tree grew. When you cut, sand, or plane wood, the grain direction matters a lot because:
Going with the grain (in the same direction the fibers run) gives you smoother cuts and less tear-out.
Going against the grain can lead to rough edges, splintering, or chipping.
Always work with the grain when sanding or planing to avoid tear-out.
Wood Movement
Wood expands and contracts with humidity—important to consider when building.
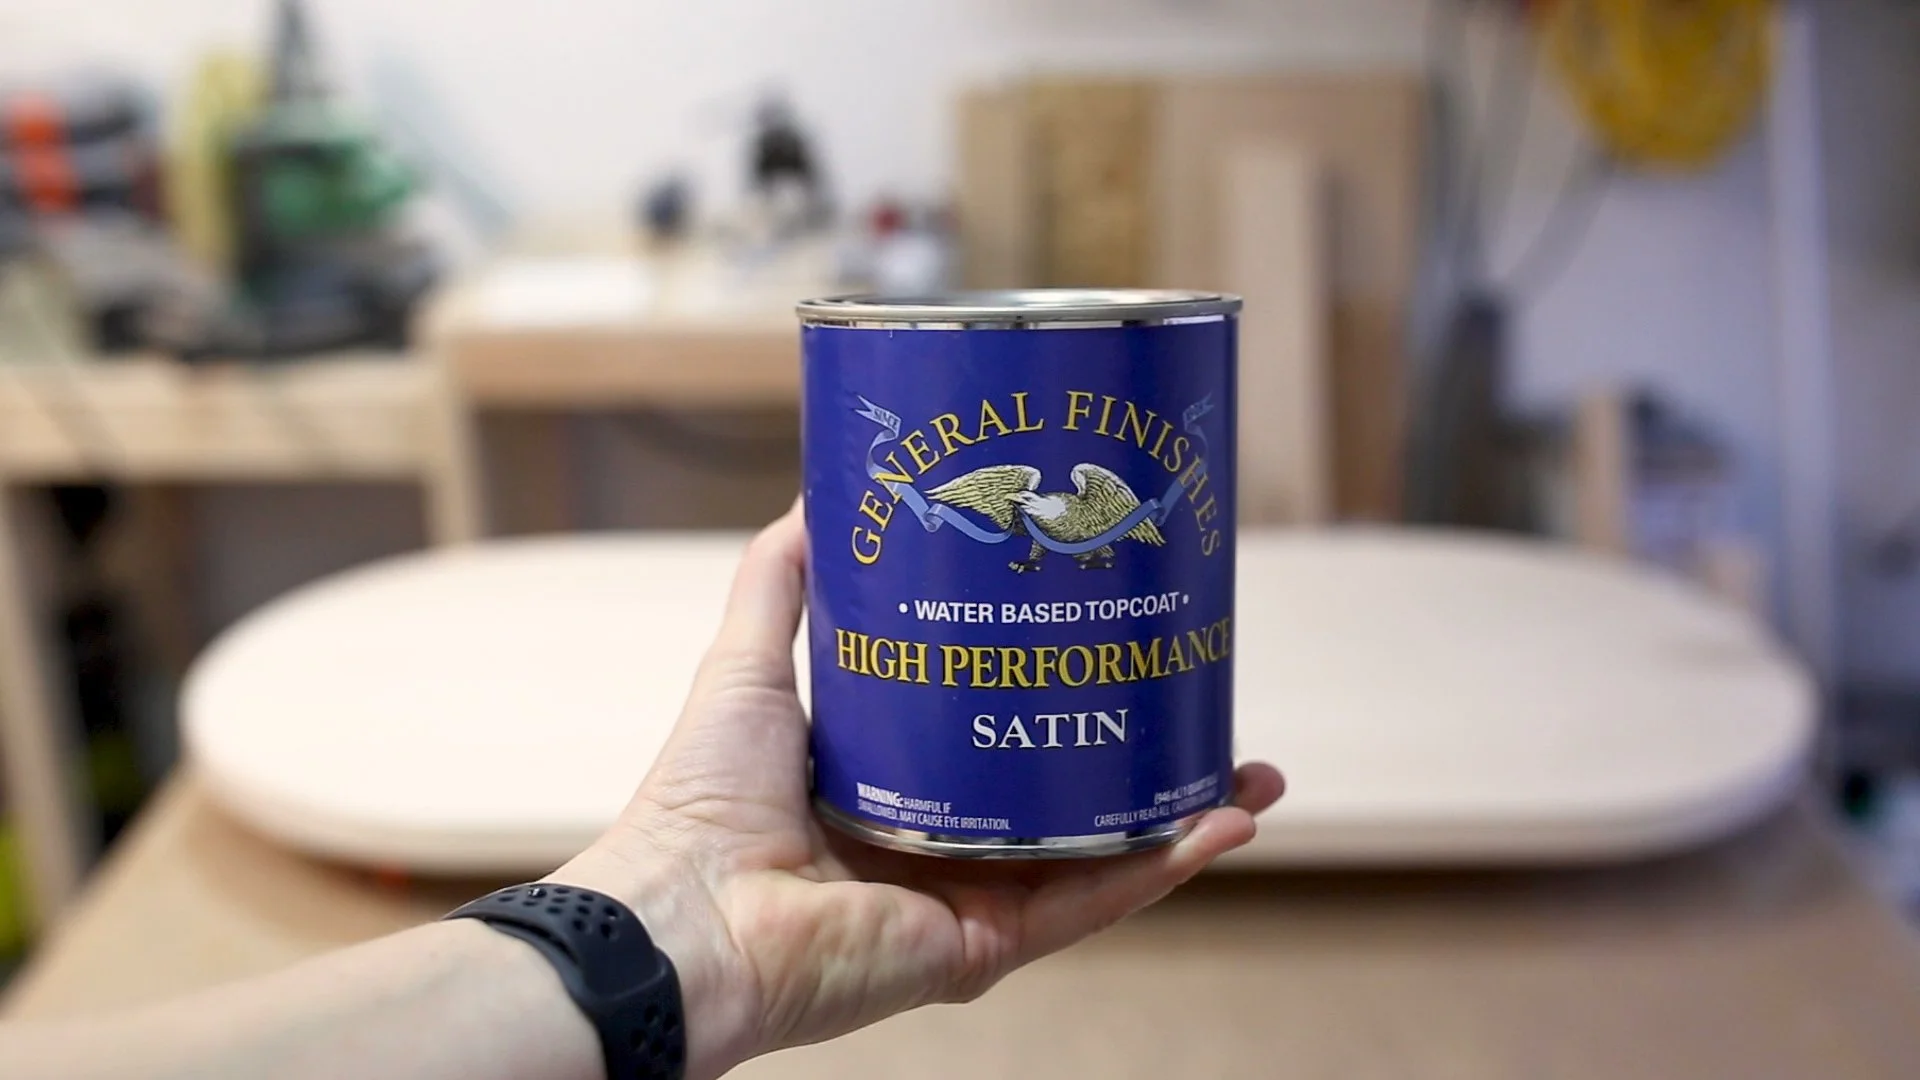
Finish
The final coating on a project—could be oil, paint, stain, polyurethane, etc.
This is by no means an exhaustive list, but it’ll give you a solid foundation when reading tutorials, buying materials, or following build plans. Did we miss anything? Let us know below!
Want to go deeper into any of these tools or terms? Head over to my Tools 101 section and keep learning!
And when you’re ready to put some of these terms into action, try one of my beginner-friendly projects:
You’ve got this!
Follow Maker Gray:
Instagram @MakerGray https://www.instagram.com/makergray/
Facebook https://www.facebook.com/MakerGray/
TikTok: https://bit.ly/3lXgdHh
If you liked this project and want to stay up to date with what I’m building, be sure to sign up for my newsletter and you’ll get an email sharing new DIY projects!
This post includes affiliate links. As an Amazon Associate, I earn from qualifying purchases. If you choose to shop through one of my links, it helps support Maker Gray — and I truly appreciate that!